How To Create and Install a Conversion Pixel On Your WordPress Website: A Complete Guide (2022)

TLDR
- Conversion tracking is a key step to increasing conversions, and conversion pixels are the most direct way to measure conversion rates
- Analytical best practices enable you to get the most value out of conversion metrics
- Pixel Manager for WooCommerce is the best (and easiest) way to get started tracking conversions on WordPress
Conversion tracking is the key to knowing how your website is performing. With a conversion pixel, you can understand what your customers are doing and how they're interacting with your site. This gives you the data you need to fix anything that's impacting the customer journey, so you can increase your conversion rate.
Marketers and business owners use conversion pixels to optimize their sales and marketing campaigns. In this article, we will explore:
- What a conversion pixel is
- Why you should use them on your landing pages and elsewhere
- Use cases
- How to install a conversion pixel on your WordPress web pages
What is a conversion pixel?
A conversion pixel is a small piece of code you can add to a website. The code enables you to track conversions for meaningful actions such as:
- Sales
- Signups
- Subscriptions
- Click-throughs
- Other standard events
A pixel is generally used for a specific reason, like when a user takes an action such as:
- Opening an email
- Visiting a website
- Viewing a digital ad
When users take these actions, they are requesting the server to download the tracking pixel attached to the content. So, marketing campaigns use them to measure the effectiveness of ads.
Why should you use a conversion pixel?
You should use a conversion pixel to measure the effectiveness of your ads. They are one of the best methods for gaining insights and metrics and enable you to scrutinize your ads and optimize them accordingly.
The best practice for a conversion pixel is to determine which areas of your website are working well and which are not. For example, a conversion pixel will highlight when a certain CTA on a specific landing page is effective in converting users, and you can create more ads that take users to that page.
On the other hand, you can pinpoint the precise areas that need improvement. As an example, imagine a typical problem: you have many people visiting a product page, but they don't buy the product. In this case, you can clearly see that the product page itself is the weak link.
These discoveries should then prompt the marketing team to engage in product page optimization. They can test different copy, images, and so on. The conversion pixel will still be running and will help them discover which improvements lead to better conversion values.
It's worth noting that a tracking pixel won't be accurate 100% of the time, as it won't be able to record every single event that happens in the browser. Some platforms, like Google Analytics and Meta Ads, also enable server-to-server tracking, which helps fill your data gaps in these scenarios.
How conversion pixels can be used (best practices)
The use cases for conversion pixels as an invaluable troubleshooting tool are limitless. They can improve website conversions in many similar ways. Here are two of the main ones:
A/B Testing
You can A/B test specific parts of your website. Pixels can be applied to discover the conversion rate of each page individually. You can use them to A/B test different:
- Calls to action (CTAs)
- Design elements
- Headers
- Main content
- Landing page copy
A/B testing each underperforming page enables you to optimize your entire website for higher conversion rates.
User behavior analysis
You can track and analyze customer behavior on each web page. First, you get the raw data on specific behaviors, and then you can analyze them in the context of broader trends.
This process enables you to keep your content relevant. Trends and web page performances change over time. So, you can use pixels to know when content becomes outdated and adjust your marketing as necessary.
Tracking conversions gives you some of the data you need to calculate the ROI of ad campaigns. Google Ads spend on pay-per-click advertising can be compared against your conversions, just as one example.
How do I install a conversion pixel on my WordPress site?
Pixel Manager for Woocommerce is easy and straightforward to install and also comes with a suite of features to ensure higher reliability. Many different plugins and other tools are available to help you install a conversion pixel. Downloading any one of them should be a straightforward task.
To have the best experience overall, we recommend installing Pixel Manager for WooCommerce. It's easy to use, has all the features you need, and comes with reasonable pricing. The plugin can be used to add pixels and use many forms of conversion event tracking and analytics solutions. This lets you understand what your visitors are doing and why.
Let's have a look at how Pixel Manager for WooCommerce helps you optimize your conversion tracking:
- Set up pixel conversion tracking for Google Ads, Google Analytics, Meta (Facebook), and Hotjar, Microsoft Ads, Twitter Ads, Pinterest Ads, Snapchat Ads, and TikTok Ads.
- Collect dynamic remarketing audiences for dynamic retargeting (Google Ads and Meta).
- Google Ads Cart Data feature
- Google Ads enhanced conversions
- Google Analytics enhanced e-commerce
- Meta Conversion API and Meta Microdata output
- Google Consent mode
- Google Dynamic Remarketing tracking for all business verticals
- Advanced Order Duplication Prevention
- Duplication Prevention to ensure your conversion reports are precise and don't count failed payments.
- Integration with many cookie consent management systems.
- Many filters that you can use to tweak the plugin output.
How to Install Pixel Manager for WooCommerce
Install and activate the plugin
-
Select the plan that suits your needs best to receive your download link. You can opt-in for a 14-day trial before purchasing the plugin.
-
Log in to your WooCommerce admin.
-
Upload the plugin into your plugin directory
- Go to “Plugins”
- Click “Add New”
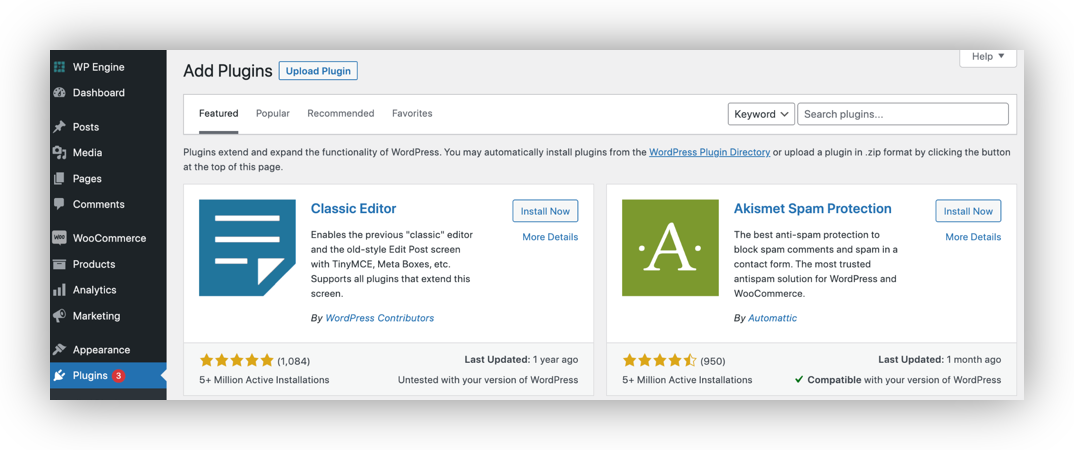
- Click “Upload Plugin”
- Click “Choose File”
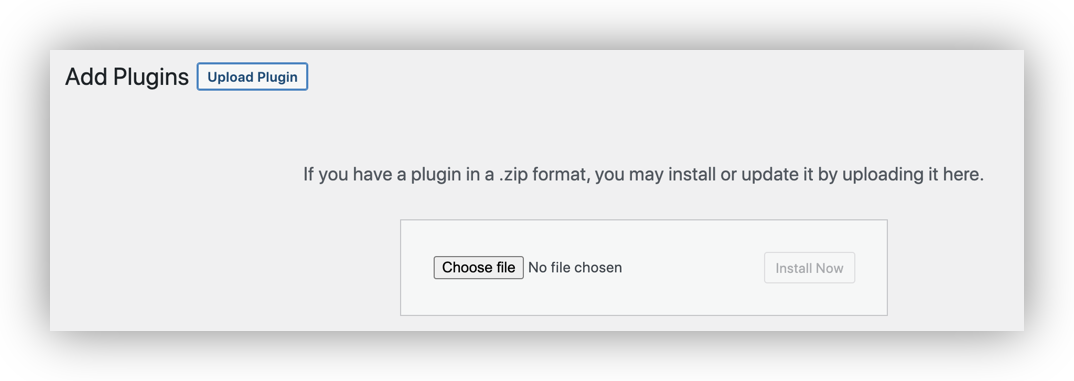
- Browse to the area in your downloads folder where the Pixel Manager for WooCommerce ZIP file is located
- Click “Install Now”
- Click “Activate Plugin” after the plugin has been downloaded and installed.
Now that the plugin is complete, you can use Pixel Manager for WooCommerce to set up all kinds of pixels.
Retrieve the Conversion Pixel ID
For every platform you set up pixel tracking for, you will need to add a pixel ID into the plugin backend. You will see various fields for all the different platforms that you can integrate with. The plugin explains what the code is called in each case and what it looks like.
If you want to set up conversion tracking for a specific platform and you're not sure where to retrieve the required ID from, you can refer to Pixel Manager for WooCommerce's documentation that explains the steps for every single platform. We are going to use Google Ads as just one example.
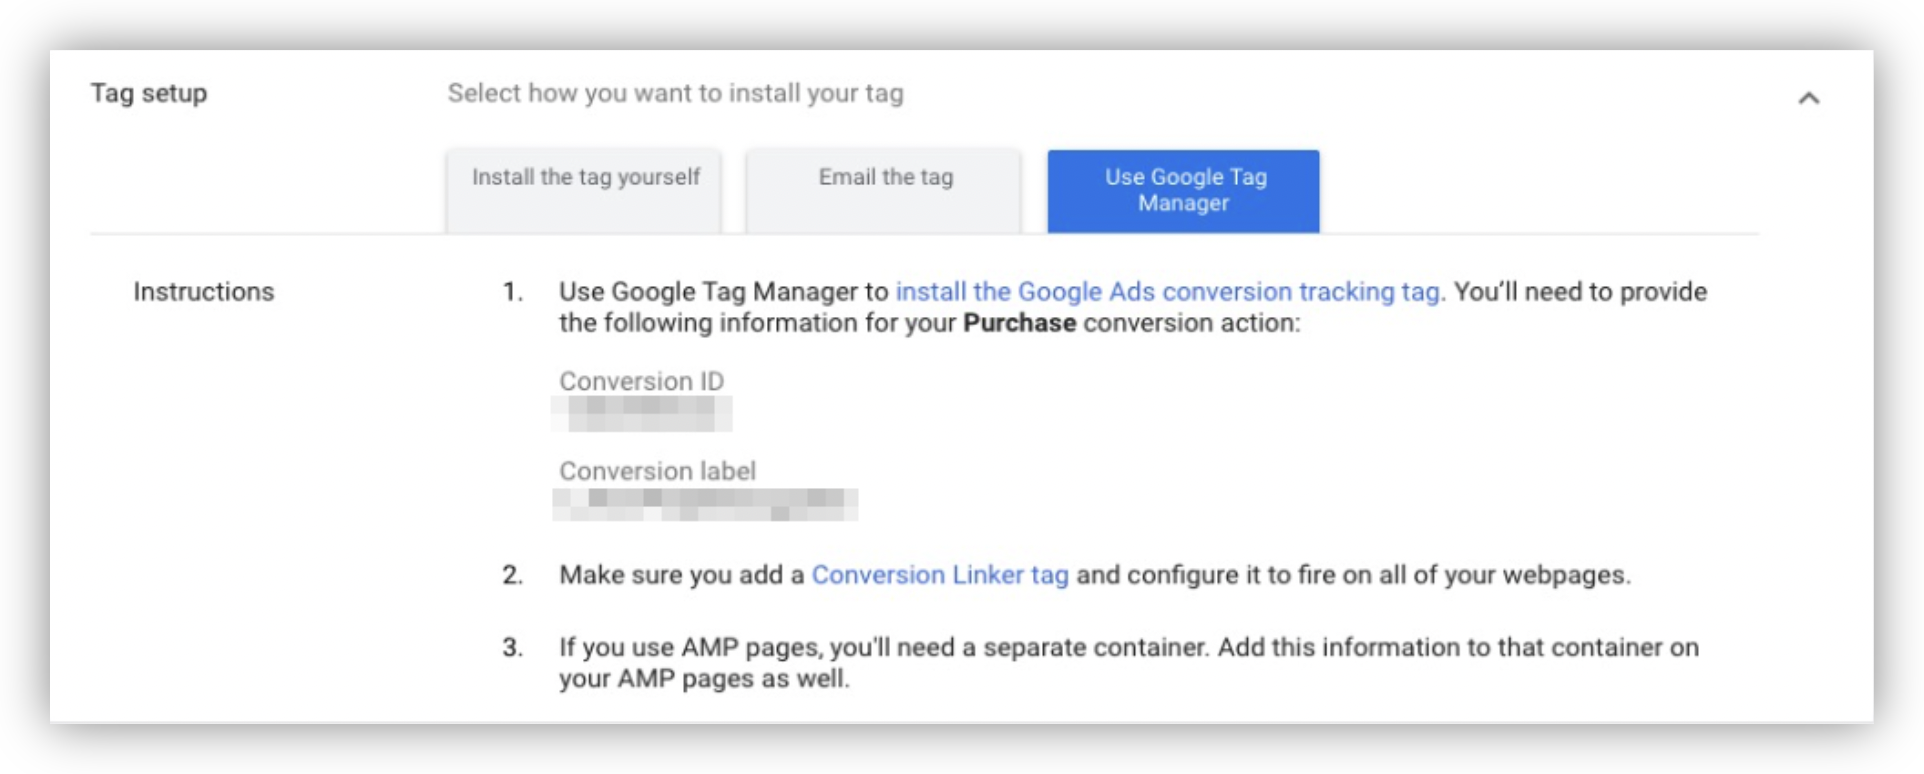
- For Google Ads, you need both Google Ads conversion ID and the Purchase Conversion Label. These are located in the Google Ads conversion tracking code.
- Log in to your Google Ads account
- Navigate to “Tools and Settings”
- Click “Measurement”
- Click “Conversions”

- Next, go to “Use Google Tag Manager” and note your Conversion ID and Conversion Label
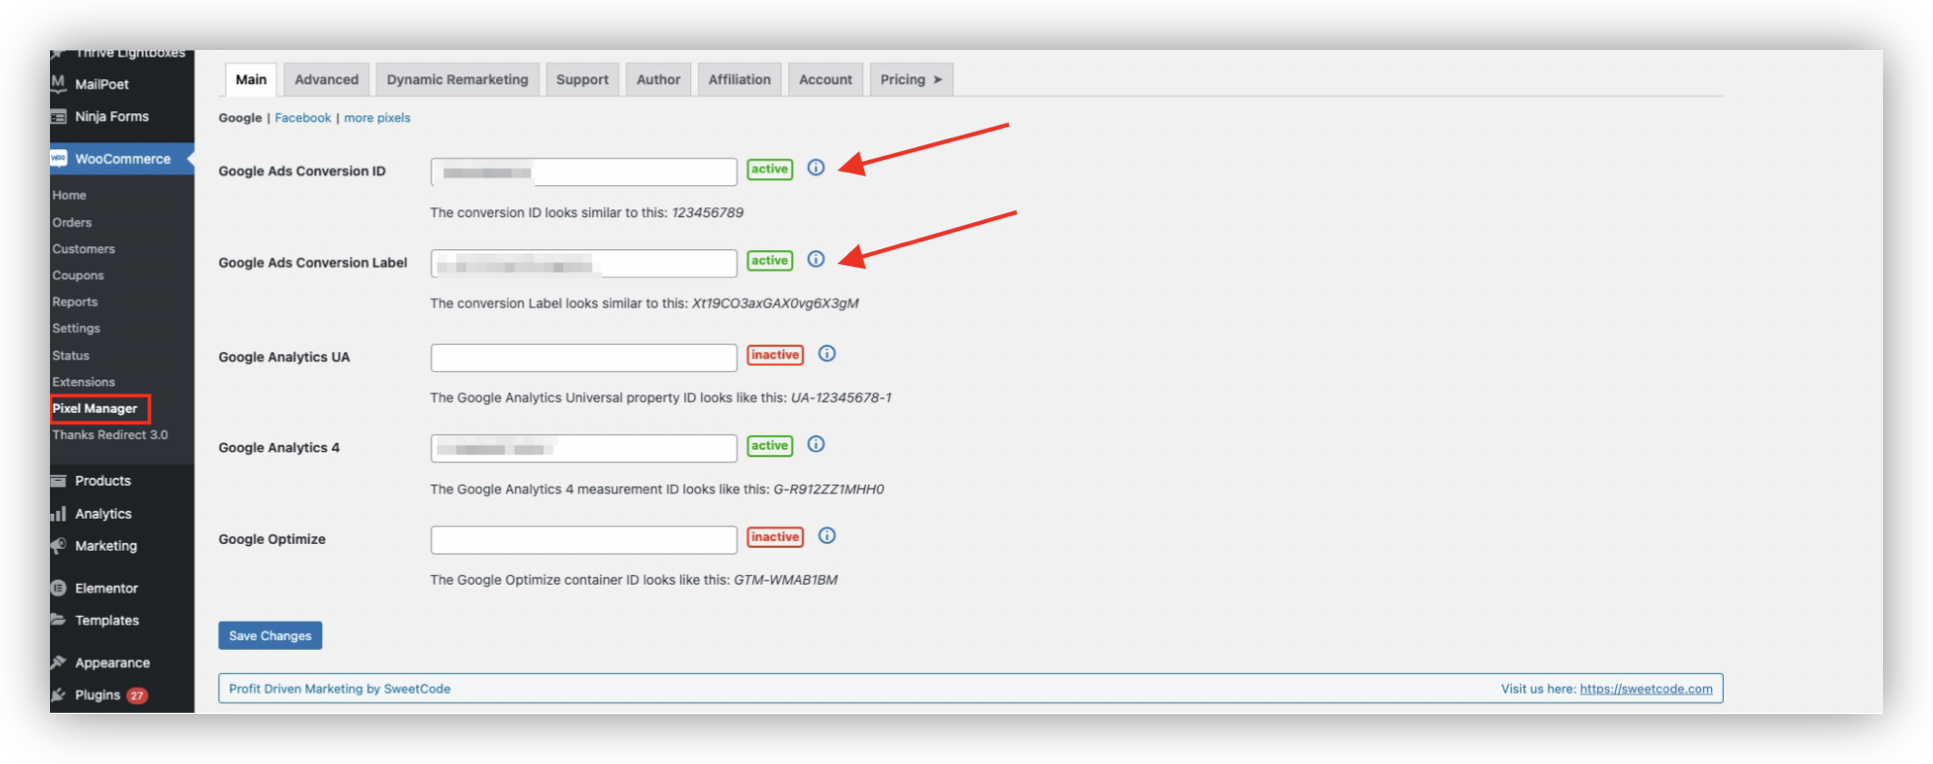
- Navigate to:
- WooCommerce
- Pixel Manager
- The Main tab
- Enter the Conversion ID and Conversion Label into the fields
Start creating and installing tracking pixels on your site
Conversion tracking pixels are a simple tool, but they can be applied in many different ways. Tracking every conversion event in your sales funnels enables you to account for every weak link while capitalizing on what already works.
For the best integrations and most efficient solution overall, we recommend Pixel Manager for WooCommerce. Here's why this is the best conversion tracking plugin available:
- Typically when you use multiple analytical solutions, you could end up with inaccurate data. With Pixel Manager for WooCommerce, your data is as accurate as it can get.
- This is one of few plugins which enables you to use multiple tracking/digital marketing/analytics tools from the same place. You won't need multiple plugins to track different solutions - which reduces the amount of time, work, and money you'd need to spend on conversion tracking!
- The plugin was built with privacy in mind which means it works seamlessly with your privacy policies like cookies or consent management systems.
Get started with Pixel Manager for WooCommerce today! When you choose your pro plan, you can opt-in for a 14-day free trial, or purchase right away to benefit from a 30-day money-back guarantee. Start tracking your conversions and improving your results today!