How to Set Up Dynamic Remarketing for Google Ads in WooCommerce

TLDR
- "Dynamic remarketing" lets you target potential customers by showing them ads that contain products they have already viewed on your site.
- To implement this in your WooCommerce site, you can use a plugin such as Pixel Manager for WooCommerce alongside Google Merchant Center.
- This post will show you how to use Pixel Manager for WooCommerce to set up Google Ads dynamic remarketing.
Do you want to run dynamic remarketing campaigns for your WooCommerce store's Google Ads?'
Dynamic remarketing is a powerful marketing tool that can help you reach potential customers who have previously visited your WooCommerce website but haven't made a purchase. It is an excellent way to re-engage with customers and increase sales.
It might sound complex, but setting up Google Ads dynamic remarketing in your WooCommerce store is quite straightforward. You'll just need a few different tools, including Google Merchant Center, WooCommerce, and a conversion tracking plugin.
In this tutorial, we're going to look at what dynamic remarketing really is, and how to set up Google Ads dynamic remarketing for your website using Pixel Manager for WooCommerce.
What is dynamic remarketing?
Before we go any further, let's discuss the difference between remarketing and dynamic remarketing.
Remarketing is the act of showing ads to people who have previously visited your e-commerce store and left without converting. This gives them the opportunity to revisit your e-commerce store, engage with your products, and make a purchase.
Dynamic remarketing follows the same principles but is even more specific. Through dynamic remarketing, you can show ads relating to the products and services a previous visitor viewed the last time they were on your site. This gives you the opportunity to send potential customers to specific product pages they may already be interested in, rather than your site's homepage or a less relevant landing page.
Of course, Google Ads is a common way to run marketing campaigns, and dynamic remarketing works well with the platform. In fact, there are a lot of benefits to setting up Google Ads dynamic remarketing:
-
You can scale your ads alongside your products and services. This dynamic approach can make use of your entire inventory, rather than just a few select products.
-
You can create a powerful feed using a variety of common formats, such as a Comma-Separated Values (CSV) file, a Tab-Separated Values (TSV) file, and even spreadsheet documents. This will let the Google Ads product recommendation engine pull the most relevant products from your feed, and display ads based on visitor viewing history and popularity.
-
Alongside Google Ads, you can calculate the most optimal bids for each impression, using an enhanced Cost-Per-Click (CPC) and conversion optimization tool.
-
What's more, the Google Ads engine can predict the most optimal dynamic ad layout for your visitor, and also perform optimization on the placement and platform.
These benefits outlined above showcase the potential that dynamic remarketing has to increase conversions on your site! Next, we'll look at what you'll need to implement Google Ads dynamic remarketing in WooCommerce.
What you need to set up Google Ads dynamic remarketing in WooCommerce
If you want to set up Google Ads dynamic remarketing in WooCommerce, there are a few tools and platforms you'll need. Here's a quick rundown of each one:
-
A Google Merchant Center account: This is where you'll upload your WooCommerce products, and it lets you manage how your product inventory appears with Google.
-
Your Google Ads account: You need this to create, run and manage your Google Ads campaigns.
-
A feed plugin: You may also want to consider a dedicated feed plugin for WordPress too. While this isn't required, it makes uploading your products to Google Merchant Center much easier. Without a feed plugin, you'll need to upload your products manually. Two feed plugins we recommend are Google Product Feed and WooCommerce Product Feed Manager.

- A tracking pixel plugin: Adding a Google Ads tracking pixel to your WooCommerce store allows you to connect your data to Google Ads' conversion reports, which means you'll get more accurate data to work with. You can set the plugin up for dynamic remarketing, which means it will collect customer behavior data (such as order value, cart abandoners, and most viewed products), and this helps Google Ads run more targeted and informed dynamic remarketing campaigns.
Why Pixel Manager for WooCommerce is essential for Google Ads dynamic remarketing
Given that a tracking pixel can supercharge your dynamic remarketing, you'll want the best solution on the market. Enter Pixel Manager for WooCommerce.

With Pixel Manager for WooCommerce, you can integrate your site with a host of ad platforms, such as Google Ads, Meta Ads, Twitter Ads, Microsoft Ads, Pinterest Ads, and TikTok Ads. You can set up dynamic remarketing for both Google Ads and Meta Ads.
You also have the option to integrate with analytics tools such as Google Universal Analytics and Google Analytics 4, and HotJar.
However, there is plenty more on offer with Pixel Manager for WooCommerce:
- It gives you an intuitive and quick way to implement conversion tracking on your WooCommerce website. You can begin your journey within minutes, especially with the right guide.
- There are advanced tracking capabilities within Google Ads too. For instance, you can track purchase conversions and conversion cart data. This means you can look at your Average Order Value (AOV), cart size, and much more.
- You can also set up enhanced conversions specifically for Google Ads in order to track data with more accuracy.
- Pixel Manager for WooCommerce is extremely accurate and has many features in place to ensure your data is reliable. For example, you can exclude user roles (like shop managers or admins) to ensure their data isn't tracked and mixed in with the report. It also prevents order duplication.
- The plugin integrates with many Cookie Consent Management plugins to avoid injecting the pixel when visitors don't want to be tracked. This ensures all your dynamic remarketing efforts are totally compliant with privacy laws. This ensures your dynamic remarketing campaigns comply with whatever privacy directives you need to follow, such as GDPR.
How to set up WooCommerce for Google Ads dynamic remarketing (in 4 steps)
Over the rest of this tutorial, we're going to show you how to set up WooCommerce for Google Ads dynamic remarketing. There are four steps you need to take, and you'll also need to switch between a few different dashboards. However, the entire process is easy, and we'll walk you through it.
1. Upload your products to Google Merchant Center
Your first step is to upload your product inventory to Google Merchant Center. There is a manual process for this, that involves the following steps:
- Head to the Tools > Setup > Business Data section of Google Merchant Center.
- On the left-hand menu, click Data feeds.
- Click the Plus icon, select Dynamic ad feed, then select your business type.
- Attach your feed file using the Choose file dialog, then click Apply.
As we've discussed above, you can automate this process by using a feed plugin, like Google Product Feed.
When uploading products, make sure you set the product ID as your identifier, rather than Stock-Keeping Units (SKU) or any other value. This will give you greater accuracy with regard to data tracking, and fewer errors when Google matches the products on the website with the ones in the Google Merchant Center.
Once you have your products within Google Merchant Center, you can start setting up your tracking pixel.
2. Install and set up Pixel Manager for WooCommerce
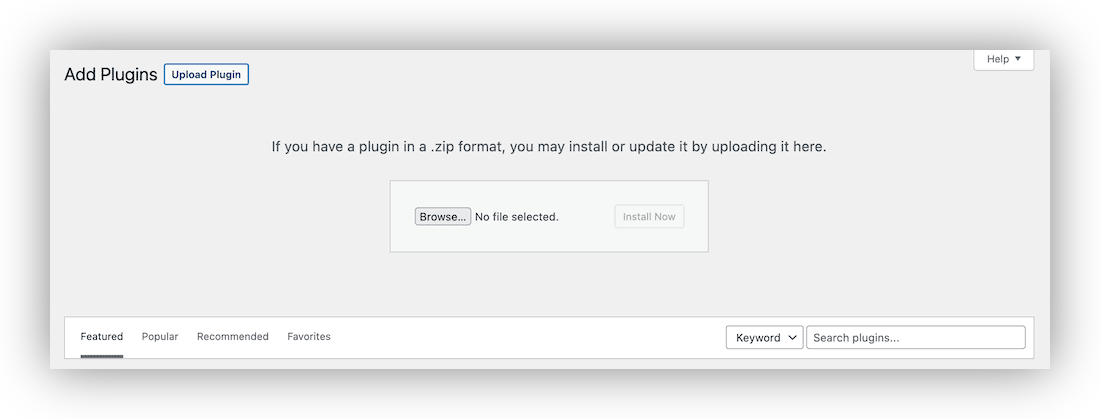
Once you select the right plan for your needs, you'll want to install and activate the plugin in the usual way with WordPress. You'll need to upload the premium version using the dedicated uploader on the Plugins > Add New screen:
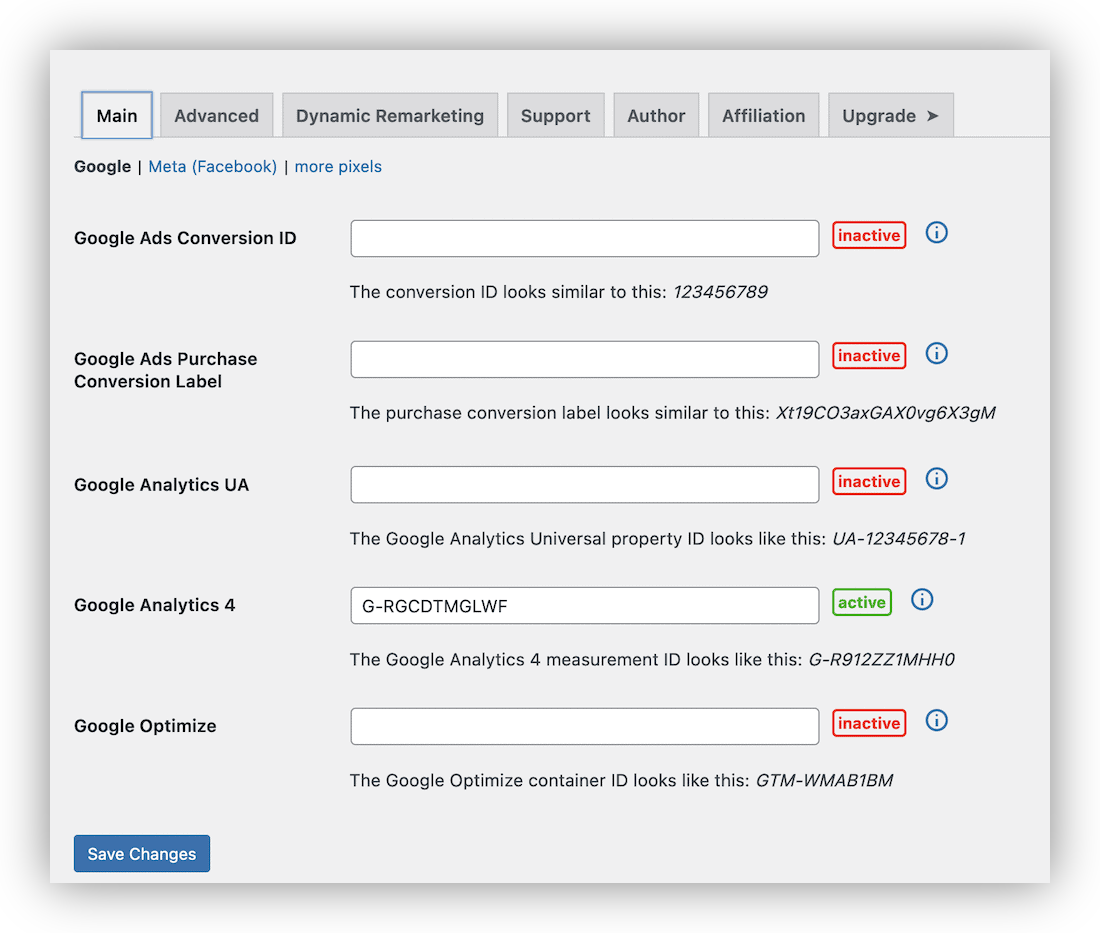
Once you do this, you'll see the WooCommerce > Pixel Manager screen. The Main tab provides you with different fields for various platforms, but the ones you need for this purpose are the Google Ads Conversion ID and Google Ads Purchase Conversion Label fields.
You'll need to find these values within Google Ads: Here's how:
- Open Google Ads and log into your account.
- Navigate to Tools and Settings > Measurement > Conversions.
- This will display the Conversion ID and Purchase Conversion Label values.
- Retrieve those codes and paste them into the Pixel Manager for the WooCommerce backend.
Please note that if you can't find your Conversion ID and Purchase Conversion Label values, it's because you need to create a new conversion. Follow our guide on how to create a new conversion in Google Ads if you need help with this.
Once you add the Conversion ID and Purchase Conversion Label to the plugin backend, you can move on to the setup process for dynamic remarketing.
3. Set up dynamic remarketing in the plugin
In your WordPress dashboard, head to WooCommerce > Pixel Manager > Dynamic Remarketing:
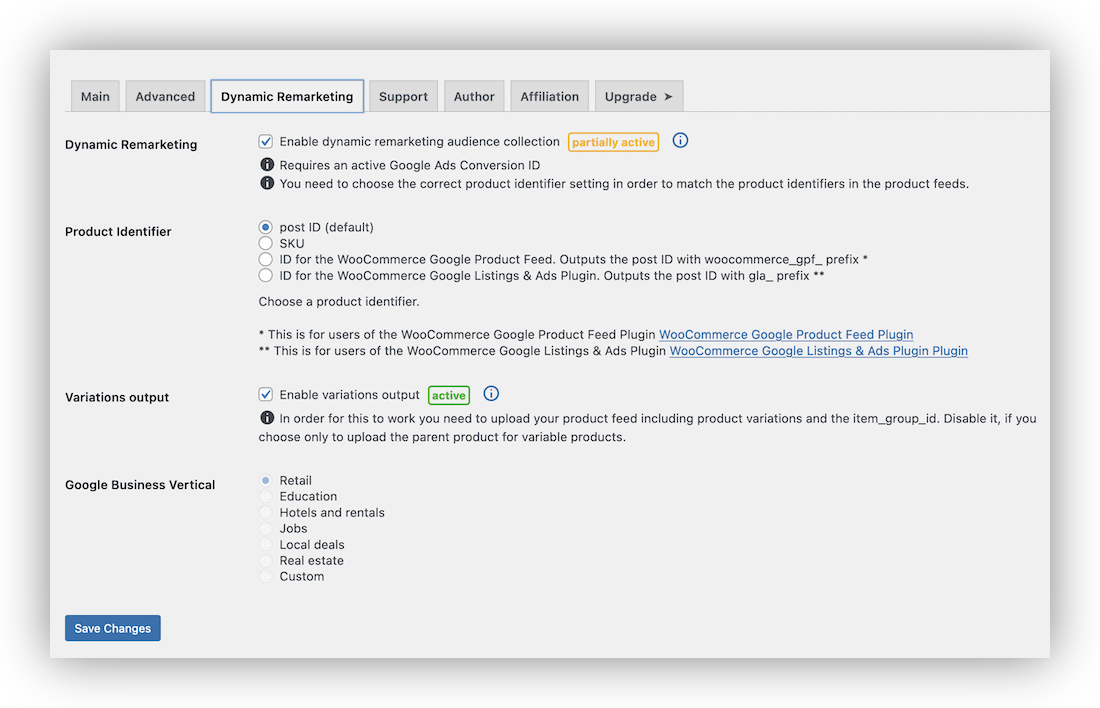
First, tick the box to Enable dynamic remarketing audience collection. Then, choose the right Product Identifier. As we've discussed above, we recommend using the post ID as the default for your Google Ads.
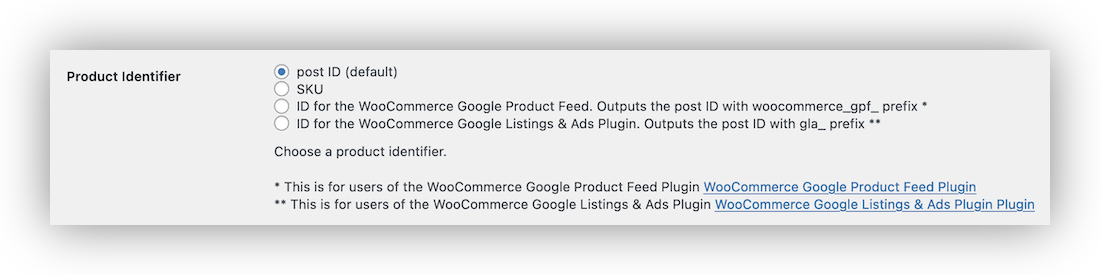
You'll also notice specific options for Google Product Feed and the Google Listings & Ads plugin if you use either of these.
Another default setting is Enable variations output. If you tick this, you'll need to upload all of your product variations to your feed along with the item_group_id. However, you may find this option is disabled depending on the feed plugin you use.

The final setting is to choose a Google Business Vertical. This should be straightforward: Whatever your business type is, select the nearest option using the radio buttons.
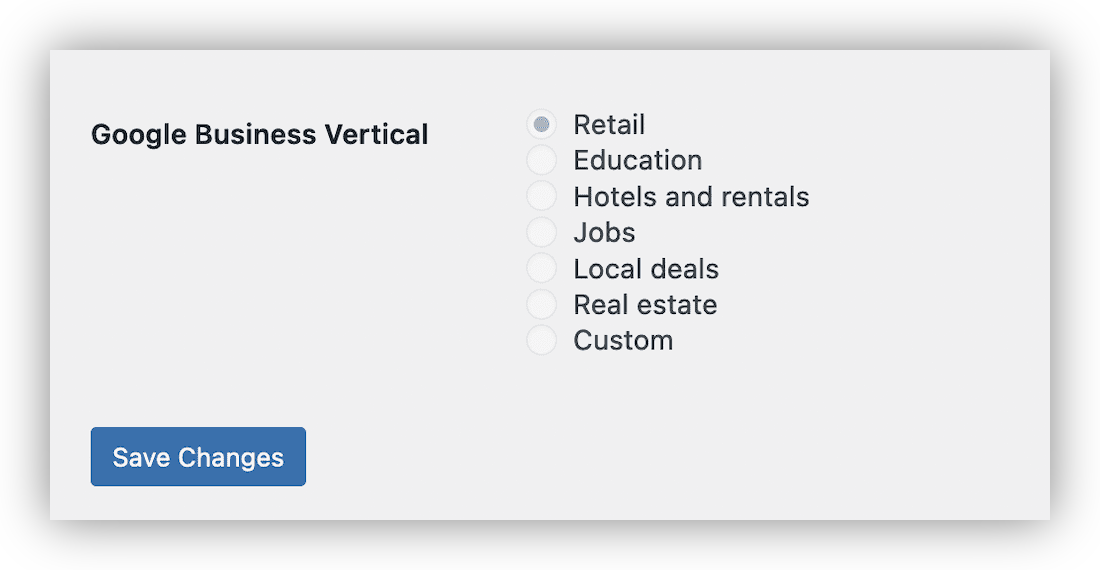
Once you fill out all of these fields, click the Save Changes button. While WooCommerce will recognize Google Ads dynamic remarketing from now on, it's not the end of the process.
4. Set up dynamic remarketing audiences in Google Ads
To connect everything together, you'll also need to set up dynamic remarketing audiences within Google Ads.
Go to your Google Ads account, and head to Shared Library > Audience Manager > Your Data Sources screen. From here, the process is straightforward:
- Under the Google Ads tag section, click the Set Up Tag link.
- Run through the basic setup wizard. This includes enabling remarketing, selecting a business type, excluding Californian users from your remarketing, and including a user ID.
- Click Save and Continue.
After this, you'll see a screen that asks you to “Reinstall the tag on your website.” However, you only need to click Continue here as Pixel Manager for WooCommerce inserts all of the necessary Google tags into your WooCommerce shop.
Once this completes, you'll have four new dynamic remarketing audiences: General visitors, past buyers, product viewers, and those who abandon a cart or checkout.
Set up Google Ads dynamic remarketing for your WooCommerce store
Dynamic remarketing is a fantastic way to increase conversions by targeting users who have interacted with specific products on your website. If a site visitor viewed a product or even added it to their cart, you can show them an ad to entice them to complete the purchase.
Pixel Manager for WooCommerce is a must-have WordPress plugin that can help you set up WooCommerce for Google Ads dynamic remarketing. It helps you to track and collect better data from your users, which makes it easier for you to improve your dynamic remarketing efforts.
Pixel Manager for WooCommerce offers five different pricing plans that each offer the same feature set. What's more, it comes with a 30-day, no-questions-asked money-back guarantee.