Setting up Conversion Tracking on your Website for Facebook Ads: Complete Guide (2022)

TLDR
- Conversion tracking is the process of measuring specific actions done by visitors on your website.
- Conversion tracking can help you analyze Ad performance and your conversion funnel and set custom audiences.
- To set up Facebook Ad conversion tracking, you need an accurate, easy-to-set-up plugin like Pixel Manager for WooCommerce.
- To set up Facebook Ads conversion tracking with Pixel Manager for Woocommerce, you need to install and activate the plugin and add the Meta pixel. You'll also need to set up CAPI and dynamic remarketing to get detailed information you can use in your marketing campaign.
If you sell products on your website, you could be one of the many businesses running Facebook Ads to get people on your site. Recent data shows that Facebook is still the most popular social media platform for running Ads. Facebook Ads offer you a variety of formats (images, video, carousels) that you can use to promote your products and services.
Facebook Ads Manager gives you various ways to measure your Ads' success. You can use metrics like impressions and Cost Per Result to understand the performance of your ads. But what if you want more insight into your customers' actions after they see your ad? That's where conversion tracking comes in.
In this post, we'll show you how to set up conversion tracking on your WooCommerce site for your Facebook Ads using a plugin called Pixel Manager for WooCommerce.
What is conversion tracking, and why is it important for your Facebook Ads?
Conversion tracking is a way of measuring specific actions that visitors take on your website. In this particular scenario, we're interested in how users behave on your site after they land there through your Facebook Ads. Tracked conversions will appear in your Facebook Ads Manager and Facebook Events Manager. Tracking conversions on your Facebook Ads has the following benefits:
Analyze your Ad performance
Through conversion tracking, you get more information about the conversion value. You'll have a clear view of which Ads are performing well, which keywords drive the most conversion and how many people are purchasing products after interacting with your Ads.
This kind of information lets you understand the return on investment (ROI) of your Ads, and as a result, you can choose to optimize underperforming Ads or simply focus your efforts on Ads that are doing well.
Analyze the conversion funnel on your website
It could be that your Ads get great engagement, but conversion events on your website are low.
For example, there's a high rate of cart abandonment. This could mean that users are interested in your products but get stuck at some point in the journey. With this information, you can easily improve your checkout page and customize the checkout process to give your customers a better user experience that can help reduce cart abandonment.
With conversion tracking, you can also analyze if you need to improve your landing pages, content on your web pages, or customer journey to increase conversions. You might be getting more page views, but the traffic is not converting. However, by tracking, you'll be able to see what your customers are responding to the most and what they don't seem to like.
Set custom audiences
You can define custom audiences based on the actions they take on your website. This is important because you'll have a better idea of which audience you should target in future campaigns.
You can also set up retargeting or remarketing Facebook ad campaigns (showing Ads to people who interacted with your Ad but didn't complete a conversion event on your site) and Dynamic Remarketing (showing Ads to audiences that match the criteria of your custom audience).
Increase sales
Conversion tracking gives you a comprehensive understanding of your purchase event, including how your ads perform. Therefore, it allows you to optimize your campaigns when needed. Conversion tracking also makes it easy for you to understand the behavior of your target customers. It also enables you to customize your website visitors' buying journey. All these increase your chances of generating more sales.
Save marketing budget
Since you can see what's working and what's not, you can easily cut off the underperforming ads that you could otherwise be spending money on. Running Facebook advertising is usually expensive, especially if you want to see results that can help determine if you should scale.
What do I need to set up Facebook Ads conversion tracking?
To set up conversion tracking on your WooCommerce site, you'll need to add the Meta pixel to your site. A Meta pixel is a piece of code that lets you record actions that happen on your site and send them to the Facebook Ad Manager.
For WooCommerce stores, the best way to add the Meta pixel to your site is by using a plugin. We recommend Pixel Manager for WooCommerce, which is the most accurate conversion tracking plugin available.
How Pixel Manager for WooCommerce works
When visitors land on your site through your Facebook Ads, the plugin will track the following events: Add to cart, Add to wishlist, Initiate checkout, Purchase, Search, and View content.
To make conversion tracking even more accurate, you can set up server-to-server tracking using Facebook's CAPI. Currently, the plugin uses CAPI to track all the same events as the Meta Pixel and also tracks subscription renewal events that occur offline.
Pixel Manager for WooCommerce creates a unique event ID for every event. This helps avoid errors occurring, like duplication of data that makes your reports less accurate.
The plugin also has additional functional layers to increase measurement accuracy. For example, if the plugin detects issues in your WooCommerce store setup that might affect tracking, it either fixes them or shows warnings and explains what to do.
If you upload your products to the Meta Catalog for Facebook, you can also set up dynamic remarketing for your audiences using Pixel Manager for WooCommerce. The easiest way to upload your products is to use a feed plugin.
Pixel Manager for WooCommerce integrates with various other platforms, not just Facebook Ads. These include Google Ads, Google Analytics, Microsoft Ads, Twitter Ads, Snapchat Ads, Pinterest Ads, and Hotjar. This is obviously great for any marketer who wants to diversify from just Facebook Ads. It's easy to set up the plugin for any of these platforms.
How to set up Facebook Ads conversion tracking with Pixel Manager for WooCommerce
Setting up conversion tracking for Facebook Ads on a WooCommerce site is quite simple. Below is a clear step-by-step guide on how to go about it.
Install and activate Pixel Manager for WooCommerce
The first step is installing the plugin on your WordPress site and activating it. You'll first need to pick your plan. The five plans on offer all include the same features, so it's a matter of deciding how many sites you want to set up conversion tracking for (the plans range from 1 site to 25 sites).
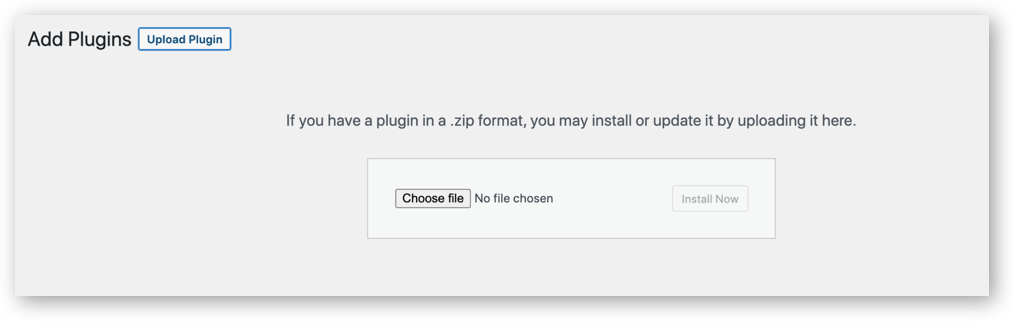
Once you have the plugin, upload it into your plugins directory by heading to Plugins > Add New.
Next, go to your WordPress dashboard menu and activate the plugin.
How to find the Meta pixel
You'll now need to find the Meta tracking code and add it to your site. To do this:
- Go to Facebook Events Manager. It'll open your Ad account.
- Click Connect data sources on the left side of the screen and choose Web.
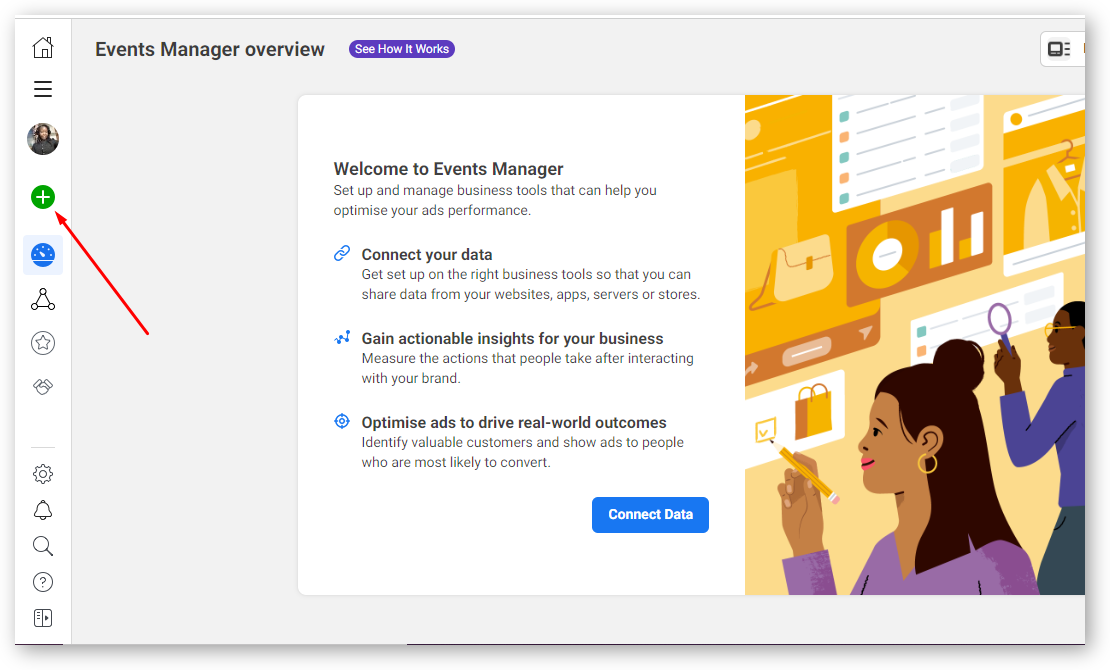
- Choose Meta pixel and click Connect
- Create your FB pixel name
- Key in your eCommerce store URL
- Click Continue
Add the Meta Pixel to your site using Pixel Manager for WooCommerce
Once your tracking Pixel has been retrieved, it's time to add it to your WooCommerce site. To do this, head over to your WordPress website to add the pixel directly.
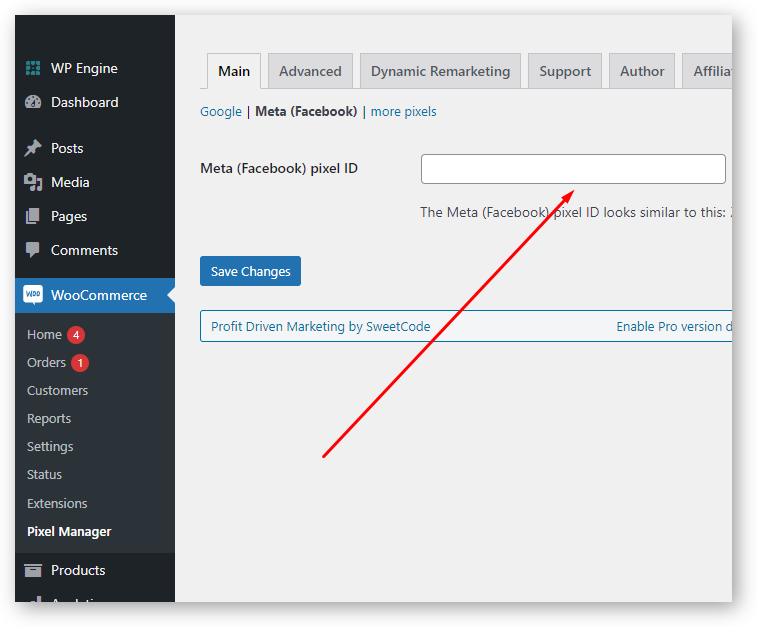
- Go to the Pixel Manager for WooCommerce tab in the WP dashboard
- Under the Main section, select Meta (Facebook)
- Paste your pixel ID
Alternatively, you can add the Meta pixel to your website via the Events Manager. This is how to go about it:
- Click save changes
- Visit Facebook Events Manager.
- Click the Data sources icon.
- Choose the pixel you created.
- Click Continue pixel setup.
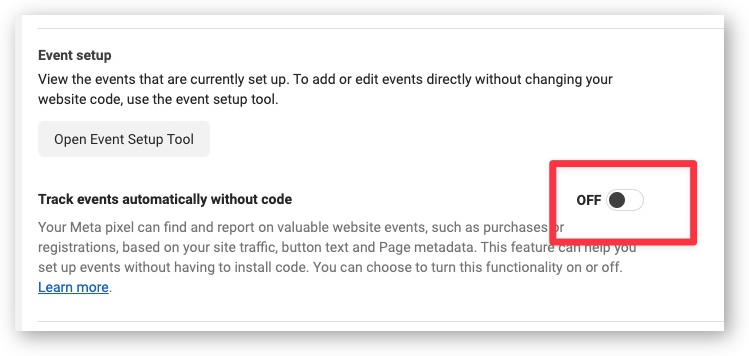
- Make sure that the automatic events tracking feature is turned off.
Set up CAPI
If you want to get more accurate data, you can set up CAPI to track server-side events alongside browser events.
- Get a Meta (Facebook) CAPI access token.
You'll need to get the CAPI access token through the Events Manager:
- Select the pixel you created
- Select the Settings tab
- Look for the Conversions API section and choose to Generate access token link under Set up manually, and follow the instructions pop-up.
Note that you don't need to request permission for your app to generate token access.
- Once you have the token access, paste it into the Pixel manager plugin to activate CAPI. To do this:
- Go to your WordPress dashboard and open the Pixel Manager for WooCommerce tab
- Under the Advanced header, click Meta (Facebook)
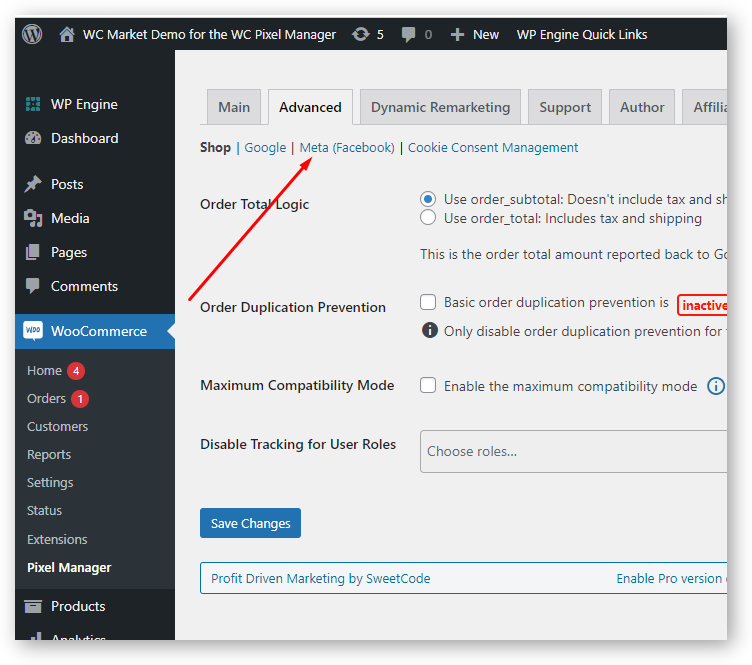
- Paste the CAPI token access and click save changes
Set up Dynamic Remarketing for your Facebook Ads
To set up dynamic remarketing, you need to first upload your products to the Meta Catalog for Facebook.
A catalog will hold information about your products, and you can use it with different types of ads and sales channels to promote your items.
Here's how to create a catalog for Facebook.
- Make sure you have a Facebook page for your business.
- Create a Business Manager account and ensure you're the business admin so that you can assign your catalog to your business.
- Next, go to the Commerce Manager.
- Click Get Started. Choose to create a catalog and then click Get Started.
- Choose the type of product you sell, then click Next.
- Next, select how you want to add products to your catalog. The way we recommend is to use a feed plugin such as WP Marketing Robot.
- Next, choose the Business Manager account that has your catalog. This will enable you to use your catalog rather than selecting a personal account. It also enables you to assign other people permission to work on the catalog.
- Name your catalog.
- Click Create.
Note that you should upload products with the Post ID as the identifier for more accuracy.
Once you have a catalog to work with, you need to go to the Dynamic Remarketing tab of the plugin and enable Dynamic Remarketing.
How to see your conversions in the Ads manager
If you have set your Facebook ad tracking conversion as explained above, you should be able to see how many conversions happened as a result of your Facebook ads.
Here's how you can measure results by customizing columns in your Ads manager:
- Visit your Ads Manager.
- Choose Campaigns> Ad sets or Ads,
- Choose the Columns drop-down menu.
- Choose Customize columns and check off the actions you want to measure.
- Click Apply.
Following the above steps will allow you to see your performance. You'll be able to collect valuable data you can use for conversion optimization, dynamic remarketing, and reporting.
Set up conversion tracking in WooCommerce to get more out of your Facebook ads
Conversion tracking for your Facebook Ads can help you get more info about your customers, including who they are and what actions they're performing on your site. Conversion tracking helps you understand how your ads are performing, allowing you to put in measures that help increase your conversions. For example, optimize your ads to target more relevant audiences.
Pixel Manager for WooCommerce helps you install the meta pixel in your WooCommerce site and makes your conversion tracking more accurate. The plugin is easy to set up, has a user-friendly interface, and can be used to track conversion from other platforms. Not just Facebook Ads.
It's also the most accurate pixel tracker available for WooCommerce stores.
Get started with Pixel Manager for WooCommerce today and redefine your digital marketing strategies. The best part, no matter the pricing plan you choose, you get a 14-day free trial and a 30-day money-back guarantee.