Shop Settings
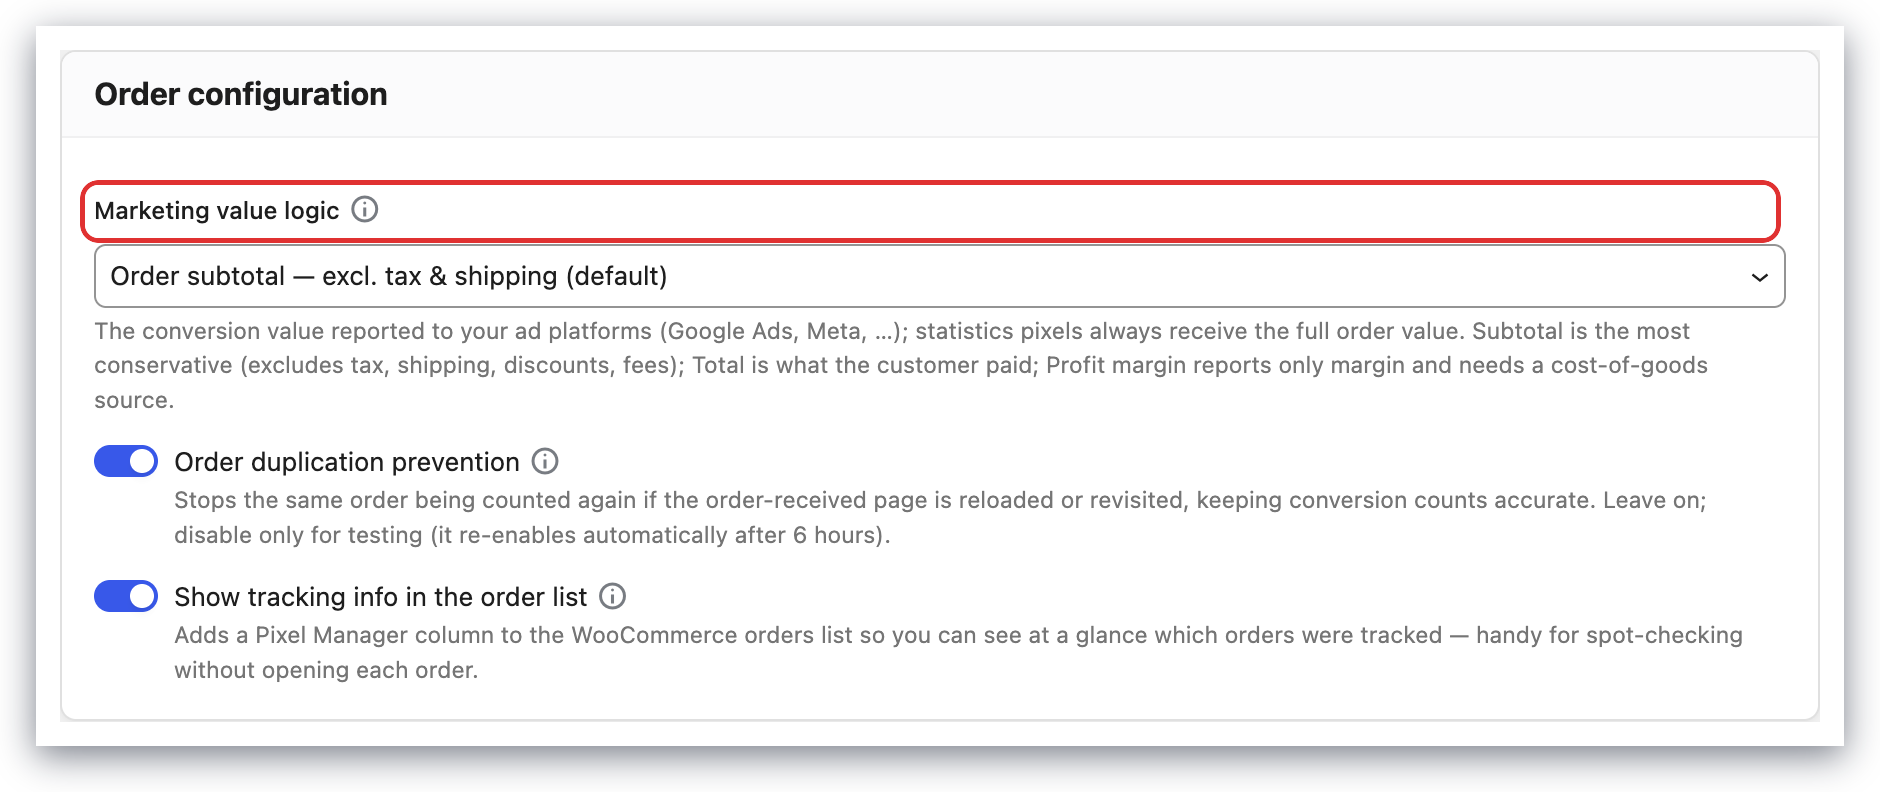
Marketing Value Logic
The marketing value logic controls the output of the marketing total value, which is sent to the marketing pixels (Google Ads, Facebook Ads, etc.). This setting excludes statistics pixels, such as Google Analytics, that will always receive the full total cart value, including taxes and shipping.
You can change this setting in the Pixel Manager under General → Order configuration using the Marketing value logic field.
Order Subtotal (default)
The order subtotal reports your product revenue only. Starting from the order total, it leaves out the shipping costs and the taxes, and it deducts the discounts, the refunds, and, if available, payment processor fees like PayPal or Stripe fees.
It is the default setting in the plugin.
Surcharges are not part of the order subtotal. If your shop adds an amount to the order as a WooCommerce order fee (a gift wrap fee, a cash on delivery surcharge, a small order fee, or a deposit instalment), that amount is not product revenue, so it is not included in the reported value. It is not deducted either: the WooCommerce order subtotal only ever contained the product line items, so there is nothing to deduct.
This is different from payment processor fees (Stripe, PayPal). Those are a cost that your payment provider keeps out of your payout, the customer never pays them, and they are not part of any WooCommerce order figure, which is why they are deducted.
If you want surcharges reported as revenue, use the marketing conversion value filter to add them, or switch to Order Total.
Refunds are deducted by their product share. Refunding only the shipping or only a fee therefore leaves the reported value unchanged, because neither was part of it in the first place.
WooCommerce lets you issue a refund either per line item or as a plain amount. A plain amount records nothing but the amount, so the Pixel Manager cannot tell which part of the order came back and attributes the whole amount to the products. The reported value then errs on the low side. Refund per line item if you want the value to be exact.
Order Total
The order total is what the customer paid and includes the shipping costs and taxes.
Profit Margin
This setting requires one of the following Cost of Goods Sold sources to be active:
- WooCommerce built-in COGS — Enable in WooCommerce → Settings → Advanced → Features → Cost of Goods Sold (available since WooCommerce 9.5, no additional plugin required)
- WooCommerce Cost of Goods (SkyVerge)
- Cost of Goods for WooCommerce (WPFactory)
You may also use a custom postmeta field for the COGS. Read further down below on how to enable it.
The Pixel Manager calculates the profit margin on the order and sends that to the marketing pixels. It starts from the product revenue of the order and deducts the cost of goods of each product, the discounts, the refunds, and the payment processor fees.
Everything it works with is net of tax, and every figure comes from the product line items. So taxes are not in it, and neither is anything the customer paid on top of the products: shipping, gift wrap fees, cash on delivery surcharges and deposit instalments were never part of the product revenue, so there is nothing to deduct.
The shipping the customer paid is not counted as revenue, and your carrier cost is not deducted, because WooCommerce records what you charged the customer for shipping but nothing anywhere records what the carrier charged you. The Pixel Manager cannot know it, so it deducts nothing.
If shipping costs you money, the reported margin is too high by that amount, and it is too high by more on the orders where you ship for free. Supply your shipping economics with the shipping profit filter, in net figures. A tax-inclusive carrier rate is wrong by its tax on every single order, which is easy to miss because the error is small and constant.
The Profit and POAS tracking recipe walks through a real shop's free-shipping threshold, which is the case where getting this wrong costs the most.
If the cost of goods has not been set on a particular product, the Pixel Manager uses a value of zero for that product. That reports the entire revenue of that product as profit, silently. Use Profit_Margin::order_has_complete_cogs() to find out whether an order is affected before you act on its profit figure.
Refunds are reversed per order item, so the cost of goods of the returned items is added back to the margin along with the refunded revenue. This needs the refunded quantity, which WooCommerce only records when you refund per line item. If you refund a plain amount instead, nothing records which items came back, so the Pixel Manager cannot add the cost of goods back and deducts the whole refunded amount from the margin. The reported margin then errs on the low side.
Where the cost of a product comes from
The Pixel Manager asks each active source in turn and takes the first cost it finds. A source that is not active is never read, so a cost left behind by a plugin you deactivated does not quietly keep being used.
For each product line of the order, in this order:
- The cost stored on the order line item, which is the cost as it was when the order was placed. WooCommerce's built-in COGS stores the line total here (
_cogs_value, unit cost × quantity), the plugins store the per-unit cost (_wc_cog_item_costfor SkyVerge,_alg_wc_cog_item_costfor WPFactory). - The cost stored on the product, asked through each source's own API. For WooCommerce's built-in COGS that resolves a variation's relationship to its parent, whether it inherits the parent's cost or adds to it.
- The product postmeta, as a fallback when a source is active but its API is unavailable:
_cogs_total_valuefor WooCommerce's built-in COGS,_wc_cog_costfor SkyVerge,_alg_wc_cog_costfor WPFactory. A variation without its own value falls back to its parent's.
If none of them holds a cost, the product is counted with a cost of zero.
The meta keys are documented so you can see what the plugin reads, not so you can read them yourself. They differ per source, per version, and between the order line item and the product, and a lookup that copies part of the list finds nothing without saying so. Call Profit_Margin::order_has_complete_cogs() instead when you need to know whether a cost exists.
Note that WooCommerce's built-in COGS deletes a stored cost of 0 instead of keeping it. On that source, a genuinely free item is indistinguishable from an item nobody entered a cost for. Give free and promotional items a token cost if the difference matters to you.
Use a custom postmeta field for the COGS
Using the following filter you can instruct the Pixel Manager to retrieve the Cost Of Goods Sold from a custom product postmeta field. Once the filter is active you'll also be able to choose and enable the Profit Margin logic in the settings. The Pixel Manager will then use the custom product postmeta field to calculate the profit margin on each order. The same key is also read on the order line item, where it is expected to hold the per-unit cost.
add_filter('pmw_custom_cogs_product_meta_key', function () {
	return 'NAME_OF_THE_CUSTOM_PRODUCT_POSTMETA_KEY';
});
The filter was called pmw_custom_cogs_meta_key before version 1.43.5. The old name still works, and still triggers WordPress' deprecation notice. Use pmw_custom_cogs_product_meta_key.
The Pixel Manager will try to subtract payment gateway fees as well. WooCommerce has no standard place for them, so each gateway plugin stores them differently: some write them to their own order meta field, and many do not store them at all. The Pixel Manager therefore reads them from the order meta of the popular gateways.
For now, the Pixel Manager can only subtract payment gateway fees for the following plugins:
If you use a different payment gateway plugin, you can supply the fees yourself with the order fees filter. You are also welcome to reach out to us and we will try to add support for that plugin as soon as possible.
This applies to the Order Subtotal option as well, which deducts the same payment gateway fees.
Worth knowing before you add the filter: it changes what your existing conversion action reports. Under Order Subtotal, the value sent to the ad platforms becomes the subtotal net of your fee from the day the filter goes live, which is a step change in your reported revenue series with no visible cause in the settings. That is usually what you want, but plan for the discontinuity rather than discovering it in a chart.
When the fee is deducted
A fee can only be deducted once the gateway plugin has stored it on the order. The Pixel Manager calculates the conversion value at two different moments, and each calculation deducts whatever fee is on the order at that time:
- Browser events (the pixel on the order confirmation page) are calculated when that page loads, which is a few seconds after the payment went through. By then the gateway has normally stored the fee.
- Server-side events (Conversions APIs, SweetCode Cloud) are calculated at the end of the request in which the gateway marked the order as paid. The gateways store the fee in that same request, so the server-side value includes it as well.
The two channels therefore report the same value. Ad platforms deduplicate the browser and the server event by their shared event ID and keep the value of the first one they receive, so the values have to agree for the deduplicated conversion to be right.
Versions before 1.66.1 calculated the server-side event the moment WooCommerce marked the order as paid. WooCommerce PayPal Payments stores the transaction fee right after that moment, so for PayPal orders the server-side value did not deduct the fee while the browser value did, and the two disagreed by exactly the fee. Version 1.66.1 moved the calculation to the end of the payment request, which closes that gap.
A gateway that stores the fee in a later request, for instance through a webhook that arrives minutes after the payment, cannot be covered by either calculation. The Pixel Manager does not know a fee is still to come, and there is no way to correct a purchase value on most ad platforms after the fact. Such orders are reported without the fee deducted. If that matters to you, calculate the fee yourself from the payment method and the order total in the order fees filter, which runs at the time the value is calculated and does not depend on the gateway having stored anything.
Dynamic Remarketing
General Information
In order for the dynamic remarketing to work, you need to either upload your products into the platform catalog (Google Merchant Center for Google Ads, Meta (Facebook) Catalog for Facebook, etc.) Google Merchant Center, or upload a custom business feed into your Google Ads account.
We strongly recommend uploading the products with post ID as identifier. Using the SKU can lead to much more issues and more difficult situations to debug.
-
Check your Product Identifier setting and adjust if necessary.
The product identifier must match the product identifiers that have been uploaded to the catalog.
-
The output for variations is enabled by default. This requires that you upload the product variations with your product feed as well, including the
item_group_id. Depending on the feed plugin you use, this might be enabled or disabled by default. So make sure to double-check. We recommend including the variations into the upload.
Product Identifier
The Product Identifier setting controls which product ID the Pixel Manager sends to the advertising platforms (Google Ads, Meta, Microsoft Advertising, etc.) for dynamic remarketing and cart data events.
You can find this setting in the Pixel Manager under General → Product data in the Product identifier field.
The identifier you pick here must match the product IDs in your product catalog or feed. If the two don't match, the advertising platform can't map the products it receives from your site back to your catalog. Dynamic remarketing then stops working, and you may see "item ID not found" or "product not found" errors in the platform.
Choose the option that matches the feed plugin you use to upload your products to the platform. If you don't use a dedicated feed plugin, leave it on Post ID, which is the WooCommerce default.
| Setting | What gets sent | Choose this when |
|---|---|---|
| Post ID (default) | The plain WooCommerce product (post) ID, e.g. 123. | You upload your products with their plain WooCommerce IDs. This is the default and the recommended choice for most shops. |
| SKU | The product's SKU. Falls back to the post ID if the product has no SKU. | Your catalog/feed is keyed by SKU. See the caution below before choosing this. |
Post ID with woocommerce_gpf_ prefix | The post ID prefixed with woocommerce_gpf_, e.g. woocommerce_gpf_123. | You use the Google Product Feed by WooCommerce.com plugin, which prefixes the IDs in its feed this way. |
Post ID with gla_ prefix | The post ID prefixed with gla_, e.g. gla_123. | You use the Google Listings & Ads (Google for WooCommerce) plugin, which prefixes the IDs in its feed this way. |
We strongly recommend the Post ID option. It is the most robust choice and the easiest to debug. Using the SKU can lead to many more issues and harder-to-debug situations, because SKUs are optional, can be duplicated, and often differ between the store and the feed.
Whichever option you pick, it must produce the exact identifiers that exist in your catalog/feed. After changing this setting, re-check (or re-upload) your feed so the IDs on both sides match.
Variations Output
The Variations Output setting controls whether the Pixel Manager sends variation-level product information or parent product information for variable products. This setting is enabled by default and is the recommended configuration for most shops.
You can find this setting in the Pixel Manager under General → Product data, labelled Output product variations as separate items.
How It Works
When a customer interacts with a variable product (e.g., a t-shirt with different sizes and colors), the Pixel Manager needs to decide which product ID to send with tracking events:
- Variations Output Enabled (Recommended): Sends the specific variation ID (e.g., "Blue T-Shirt, Size M") with all tracking events.
- Variations Output Disabled: Sends the parent product ID (e.g., "T-Shirt") regardless of which variation the customer selected.
Affected Events
This setting affects all product-related tracking events across all advertising platforms:
view_item– When viewing a product page (including variation selection)add_to_cart– When adding a product to the cartremove_from_cart– When removing a product from the cartview_item_list– When viewing category or search result pagessearch– When viewing search resultspurchase– When completing an order
Affected Platforms
This setting affects all marketing pixels supported by the Pixel Manager equally.
When to Enable (Recommended)
Enable Variations Output when your product catalog/feed includes all product variations as separate items. This is the recommended approach because it:
- Enables more precise retargeting (showing customers the exact variation they viewed)
- Allows better audience segmentation at the variation level
- Provides more accurate conversion tracking for specific product variants
When uploading variations to your product feed, ensure your feed plugin includes the grouping field that links all variations to the same parent product. For Google Merchant Center, this is the item_group_id field. Other platforms may use different field names for the same purpose.
When to Disable
Disable Variations Output only if your product catalog/feed contains only parent products for variable products. This might be the case if:
- Your feed plugin doesn't support exporting variations
- You have a very large catalog and want to reduce feed complexity
- The advertising platform you're using has limitations with variation-level tracking
Disabling this setting when your feed contains variations (or enabling it when your feed only contains parent products) will cause a mismatch between the product IDs sent by the Pixel Manager and the IDs in your product catalog. This breaks dynamic remarketing and can result in "product not found" errors in your advertising platforms.
Google Ads
There are several ways to upload your products to the Google Merchant Center. The easiest one is to use a feed plugin. So far, we can recommend the following two:
Google Merchant Center Feed
- Google Product Feed by WooCommerce.com
- Relatively easy to use
- Has difficulties handling large feeds
- Only good for Google Ads and Microsoft Ads
- WooCommerce Product Feed Manager by WPMarketingRobot
- Many options, but comparably difficult to set up
- Handles large feeds very well
- Supports many marketing channels
Custom Business Feed
For countries where the Google Merchant Center is not available, you can upload your product using a custom business feed. Create a feed
You will also need to set the Google Business Vertical to 'custom'. This is available in the Pro version of the Pixel Manager.
Google Business Vertical
This is a pro feature. Get the pro version here
The Business Vertical tells Google which kind of catalog your dynamic remarketing events belong to. Google uses it to match the IDs the Pixel Manager sends against the right catalog/feed, so the value you choose here must match the vertical of the feed you uploaded (Google Merchant Center retail feed, custom business feed, etc.).
You can find this setting in the Pixel Manager under Tracking Pixels → Google (Ads & GA4) (under Show advanced settings) in the Business vertical field.
The Pixel Manager offers these verticals:
- Retail (default) — standard online stores selling physical products. This is the right choice for almost all WooCommerce shops using a Google Merchant Center retail feed.
- Education
- Hotels and Rentals
- Jobs
- Local Deals
- Real Estate
- Travel
- Custom — use this when you upload a custom business feed (for example in countries where the Google Merchant Center isn't available).
If your products are uploaded through a standard Google Merchant Center retail feed, keep this on Retail. Only switch to Custom when you've set up a custom business feed in Google Ads, and make sure the vertical matches on both sides — a mismatch breaks dynamic remarketing matching.
Setting Up Dynamic Remarketing Audiences in Google Ads
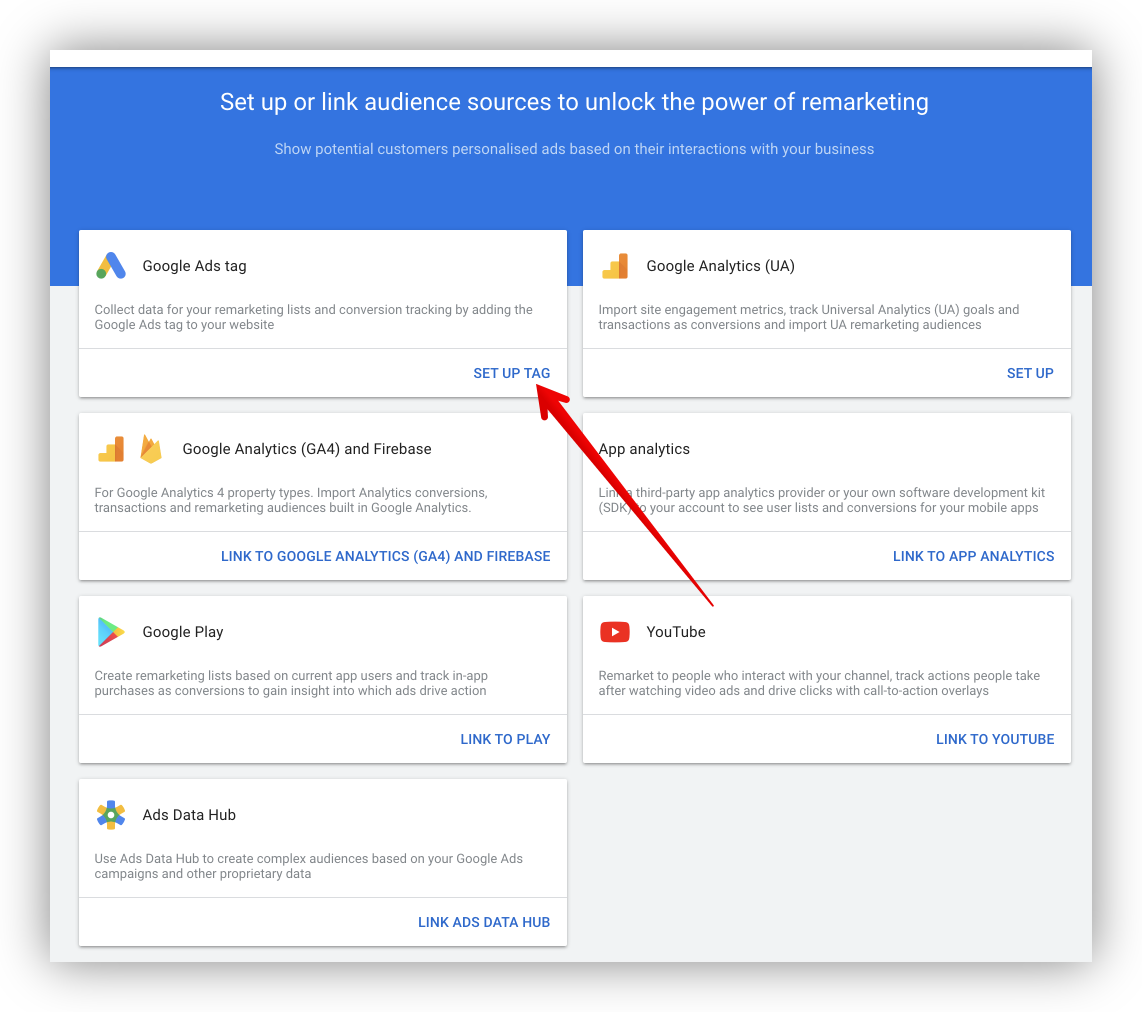
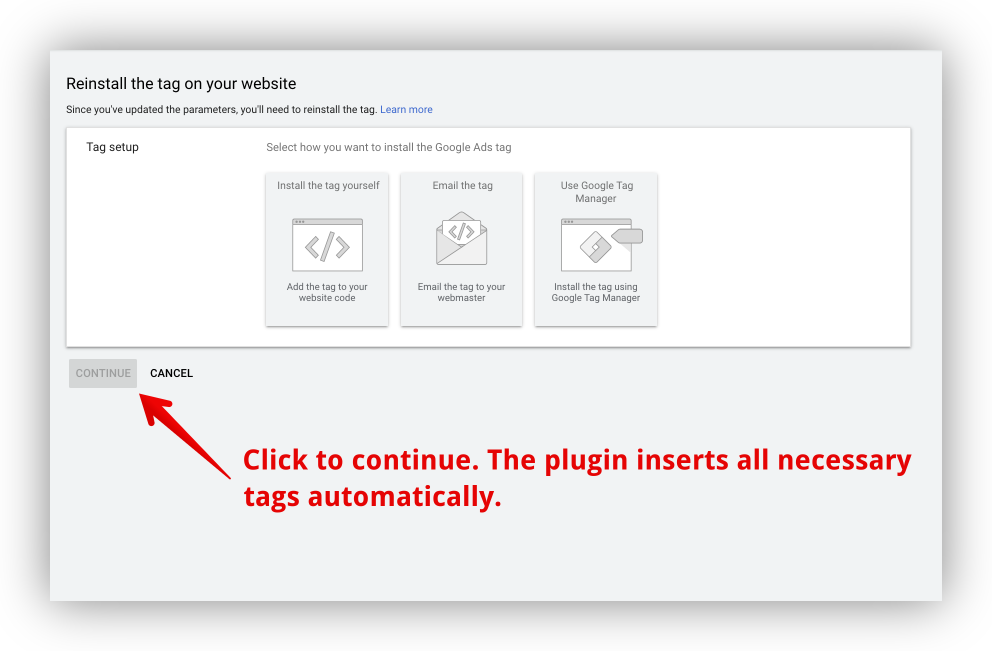
Within Google Ads browse to > Shared Library > Audience Manager > Audience Sources.
- Click on Setup Tag
- Configure basic settings
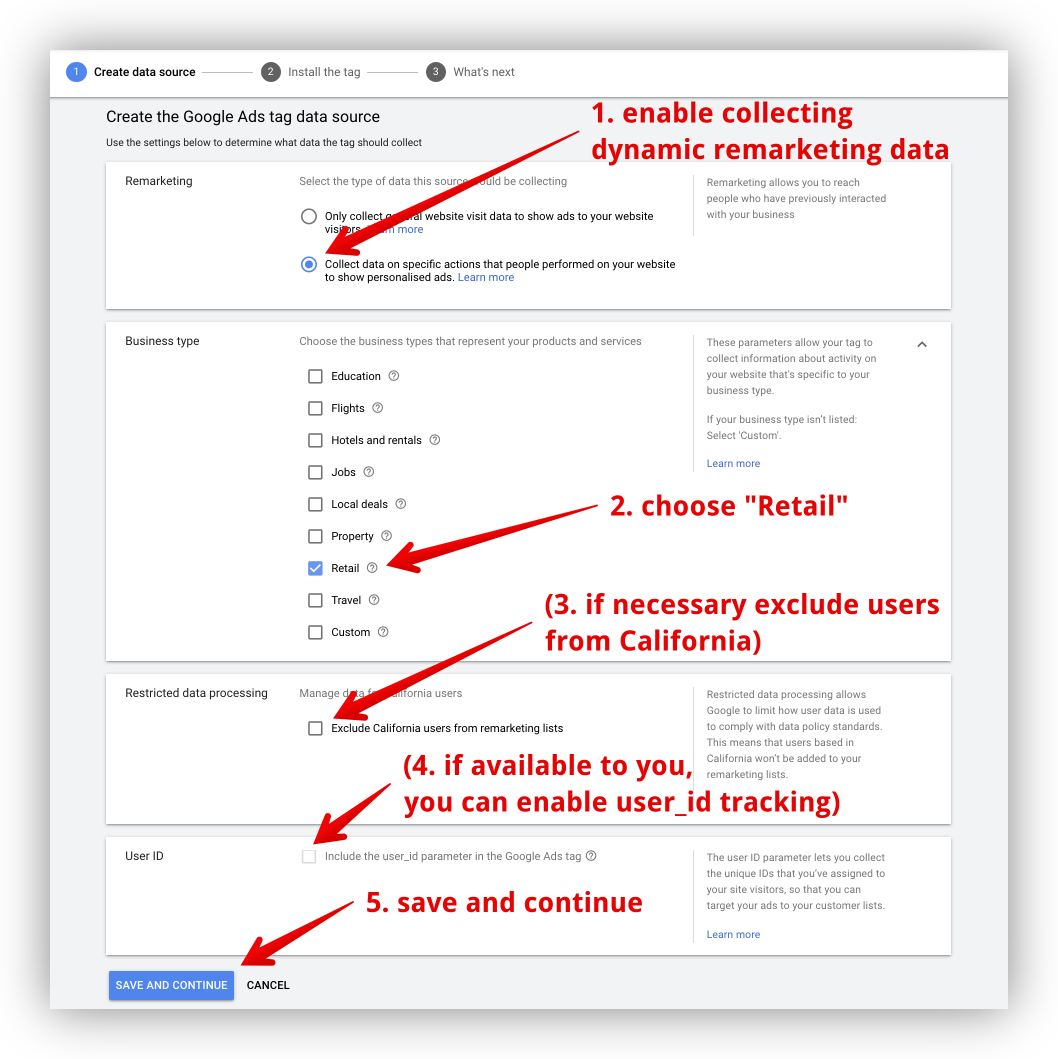
- Finish setup
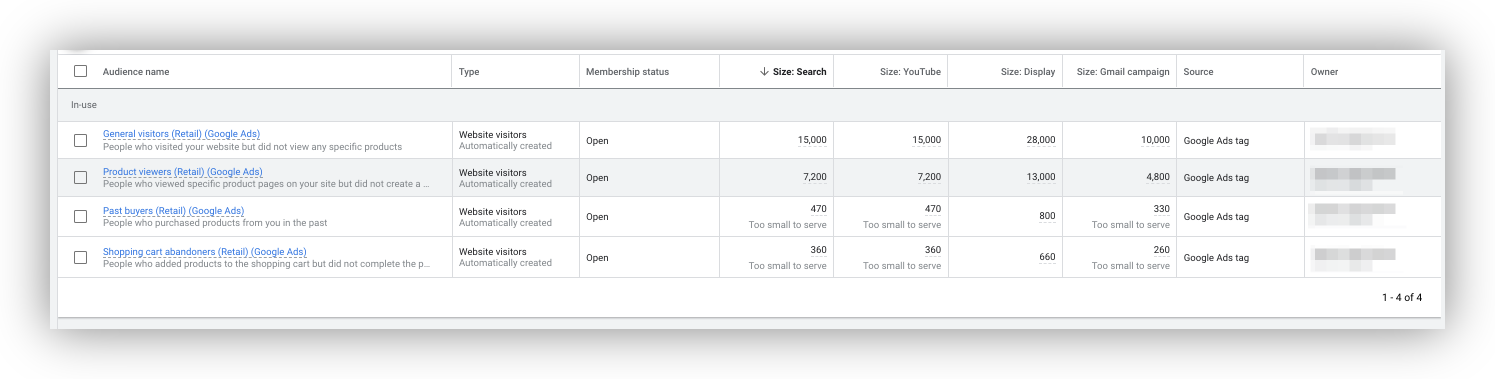
After finishing the setup, Google Ads will automatically create four new dynamic remarketing audiences.
Subscription Value Multiplier
This is a pro feature. Get the pro version here
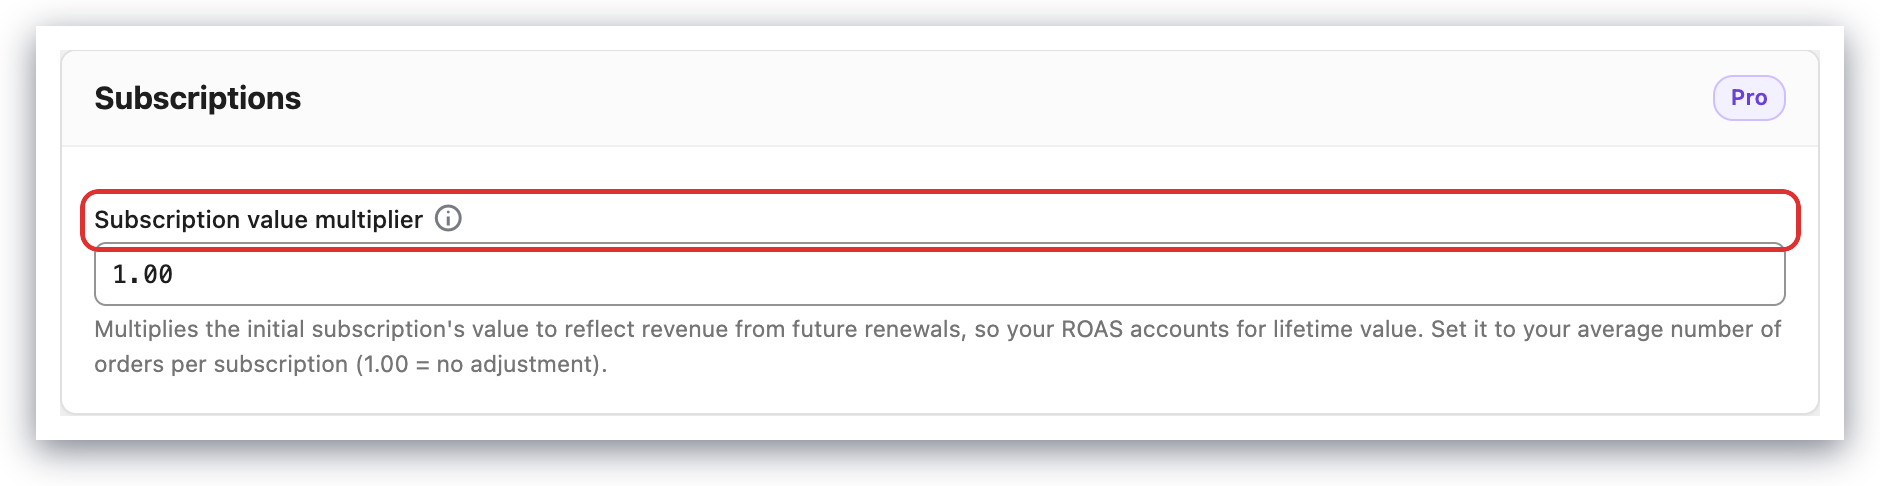
By default, the conversion value for subscriptions transmitted to the paid ads conversion pixels only contains the value of the first subscription. But, a subscription may yield a much higher effective conversion value or customer lifetime value (CLV) because a subscription usually creates more than one automatic order in the future. Unfortunately, all those future conversion values can't be captured by the paid ads conversion pixels because they don't require checkout by the visitor using the browser.
Therefore, we implemented the subscription value multiplier into the Pixel Manager. It multiplies the subscription value to closely match the effective conversion value or customer lifetime value generated by a subscription.
The default value of the setting is 1.00. You can set any multiplier larger than 1.00.
You can find this setting in the Pixel Manager under General → Subscriptions in the Subscription value multiplier field.
How to determine an appropriate multiplier
There is no general multiplier that can be used for all shops. The multiplier entirely depends on how long a subscription lasts on average for a specific shop.
A good approach is to average how often a subscription renews before the customer cancels it.
To calculate this, take the total count of subscription orders (initial and renewal orders) and divide it by initial subscriptions. This will give you an average number of times a subscription is renewed. And that is the number that you can use as a multiplier. Feel free to use a slightly lower number to stay on the more conservative side to account for fluctuations in the effective renewal multiplier over time.
Lifetime Value Calculation
The Pixel Manager can calculate the lifetime value (LTV) of a customer based on the total order value and the marketing value of all orders. The value is then available on the order details page and can be used by marketing pixels to optimize ad campaigns.
Active Lifetime Value Calculation
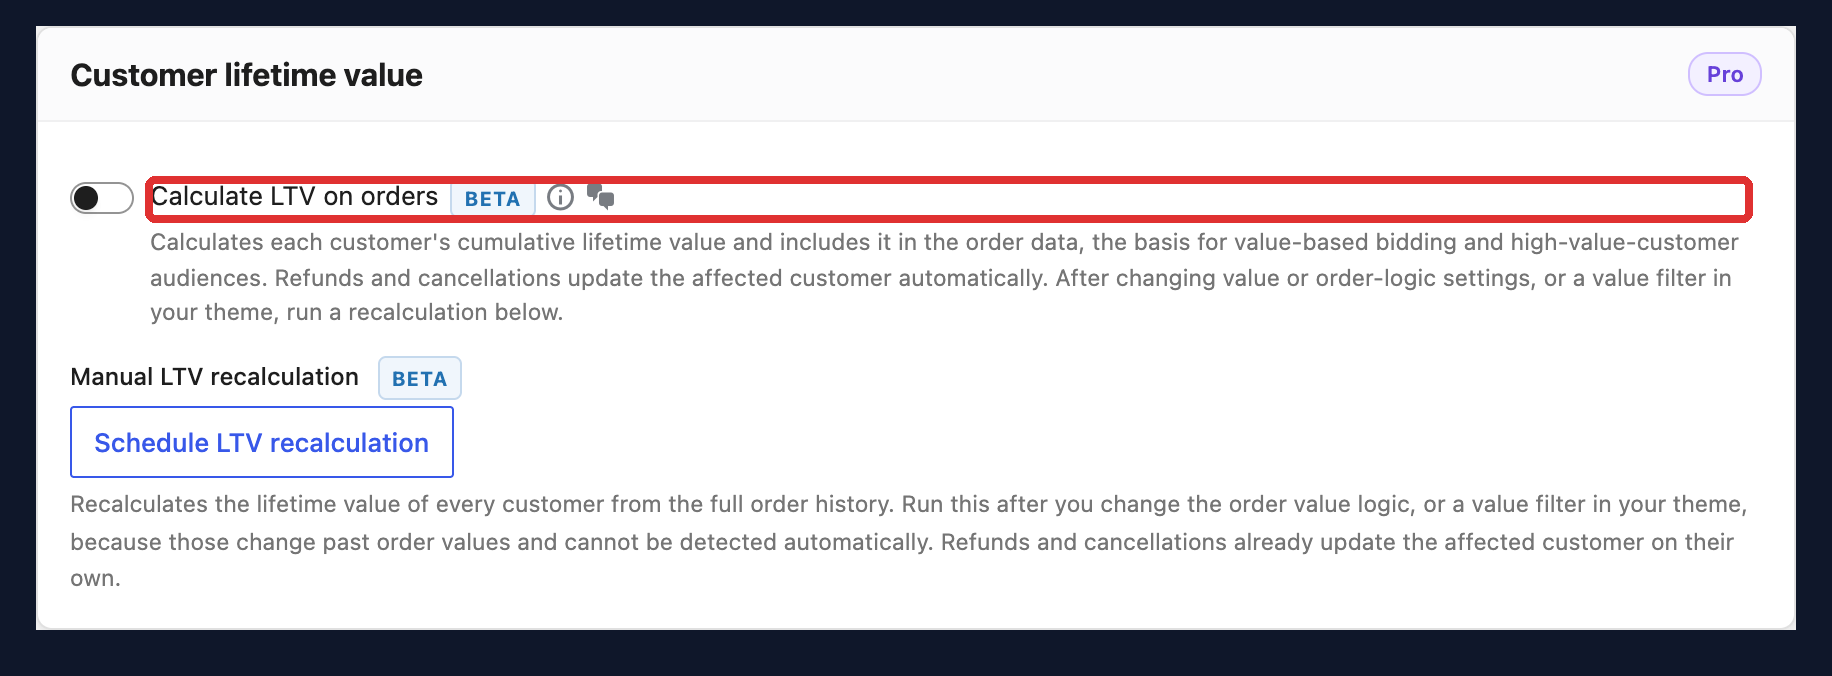
- In the Pixel Manager, open General → Customer lifetime value.
- Turn on Calculate LTV on orders.
- Save.
Lifetime Value Calculation Recalculation
The lifetime value (LTV) of a customer is calculated automatically each time that customer places an order, and refunds and cancellations update the affected customer automatically as well. A recalculation across all customers is a manual operation that you start yourself.
The Pixel Manager calculates different types of lifetime values:
- Total order value LTV: This LTV is the sum of all total order values of a customer.
- Marketing value (LTV): The marketing value LTV is the sum of all order marketing values. The marketing values are based on your order total logic setting. It will take the value calculated by the order total logic for each order and sum them up. If you use a custom marketing conversion value filter, then the marketing value LTV will be based on that value.
When to run a full recalculation
The lifetime value is stored cumulatively on each order, so if the value of one past order changes, every later order of that customer carries the old figure until it is recalculated. Run a full recalculation after you change something that affects the value of orders that have already been placed:
- After changing the order total logic setting.
- After adding or changing a marketing conversion value filter or another value filter in your theme or a plugin.
- After importing or migrating historical orders.
The Pixel Manager does not detect these changes on its own, by design. A value filter lives in your theme's functions.php or in a plugin, so there is no setting change or other event the Pixel Manager could watch to notice it. The only way to detect that values have shifted is to recalculate them, which is exactly the expensive operation being avoided. Earlier versions attempted this autodetection and it caused serious performance problems on shops with a large order history, so it was removed. Recalculation is now always something you trigger deliberately.
Running the recalculation
In the Pixel Manager, open General → Customer lifetime value → Manual LTV recalculation.
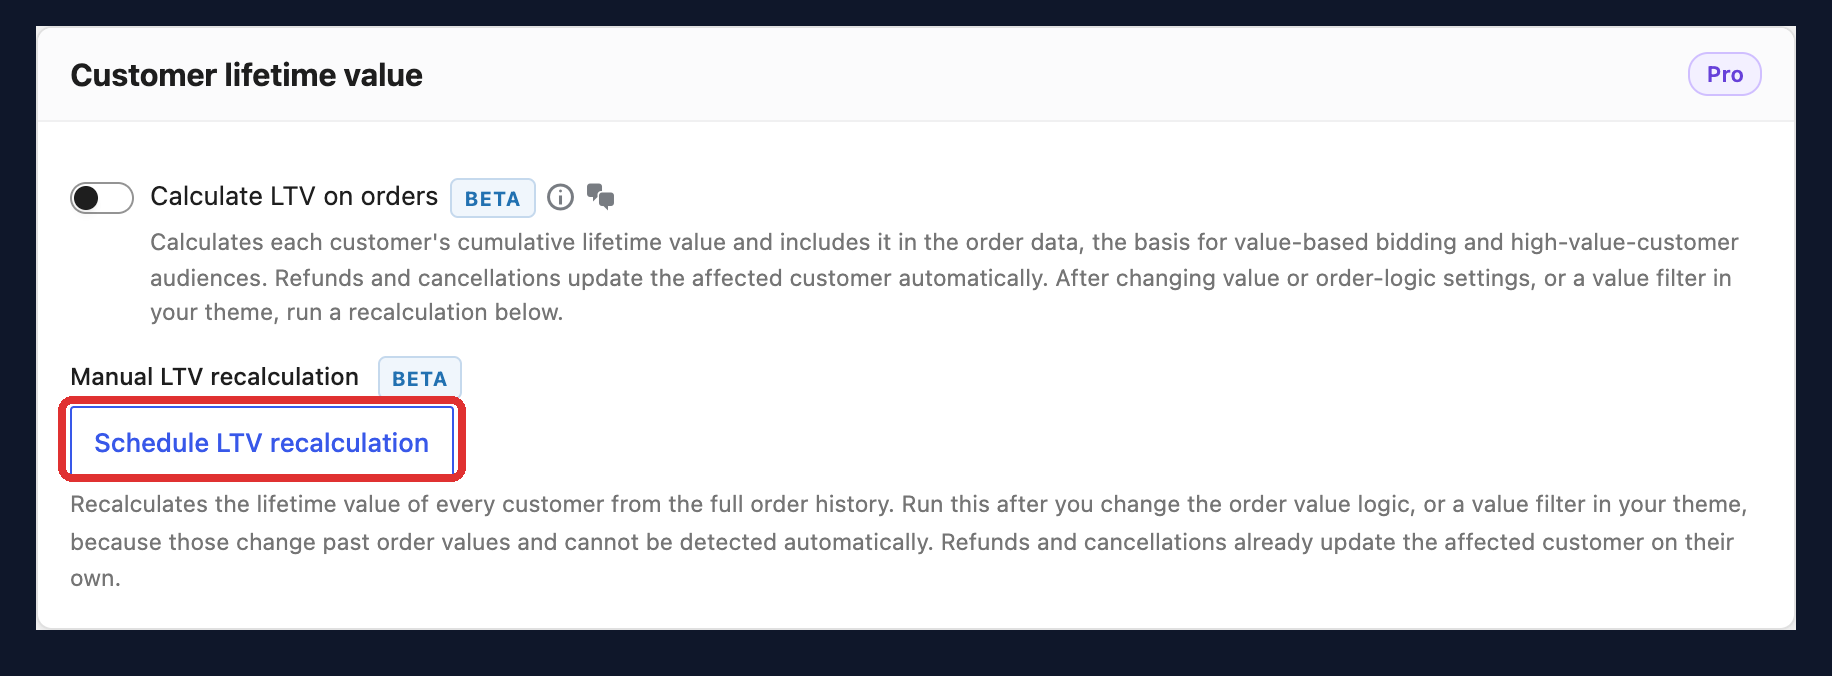
- Click Schedule LTV recalculation. The run is scheduled for 2:00 AM in your site's local time, so it stays out of your busiest hours.
- While it is scheduled, two more options appear. Run it now instead starts the recalculation immediately, and Stop all LTV calculations cancels it again.
Stop all LTV calculations also clears the per-customer recalculations that are queued by refunds and cancellations, so use it when you want the Pixel Manager to stop all lifetime value work, not just the scheduled full run.
Bear in mind that recalculating the LTVs for all customers can take a long time and take up a lot of server resources. Unless you need the new figures right away, prefer the scheduled overnight run.
The Pixel Manager uses the Action Scheduler to run the recalculation in the background. It may trigger timeout messages in the log files. Those can be ignored. The Pixel Manager handles them internally and ensures that the recalculation is completed.
Extra Order Data Output
The Pixel Manager can output extra order data that helps you to debug and understand that data that is sent to the marketing pixels.
In the Pixel Manager, open General → Extra order data output and turn on Output extra order data on order pages.
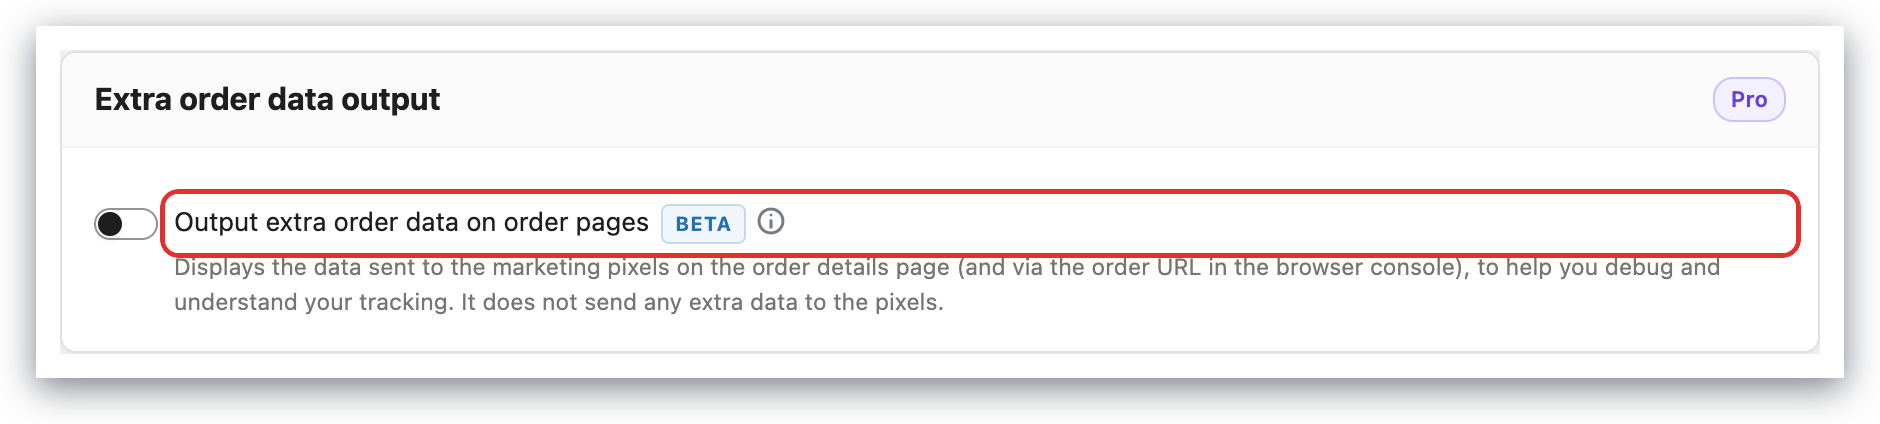
Now you will see the extra order data on each order details page.
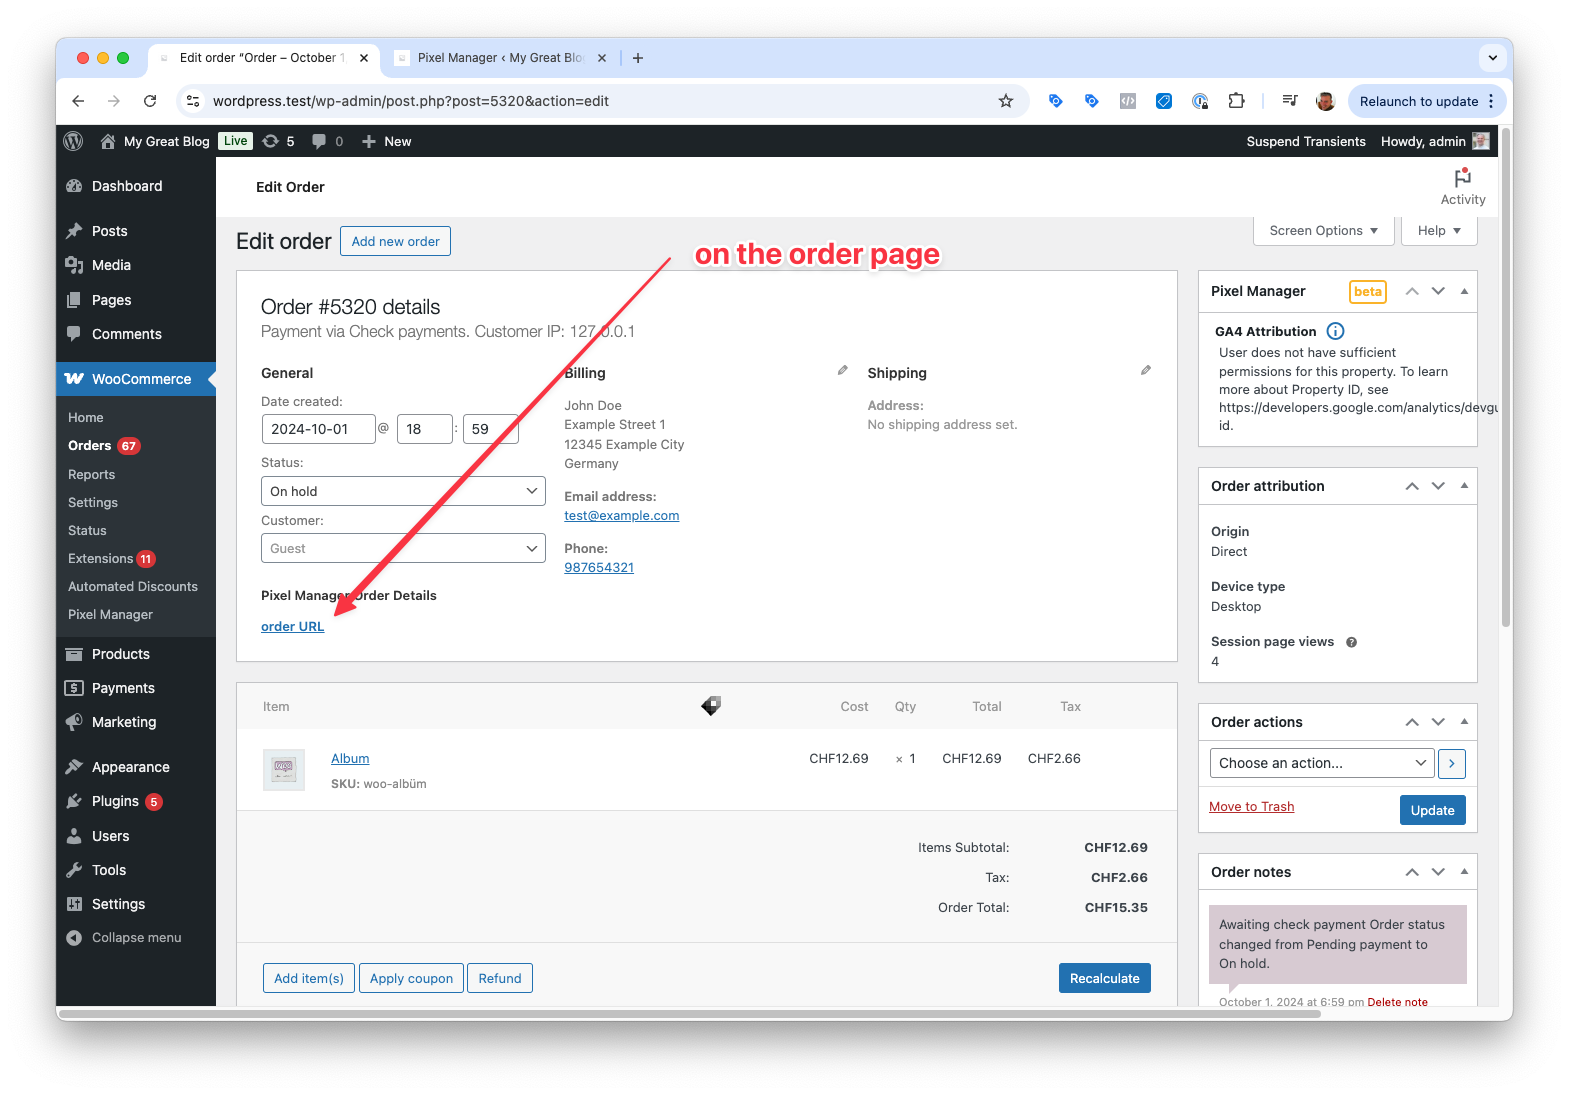
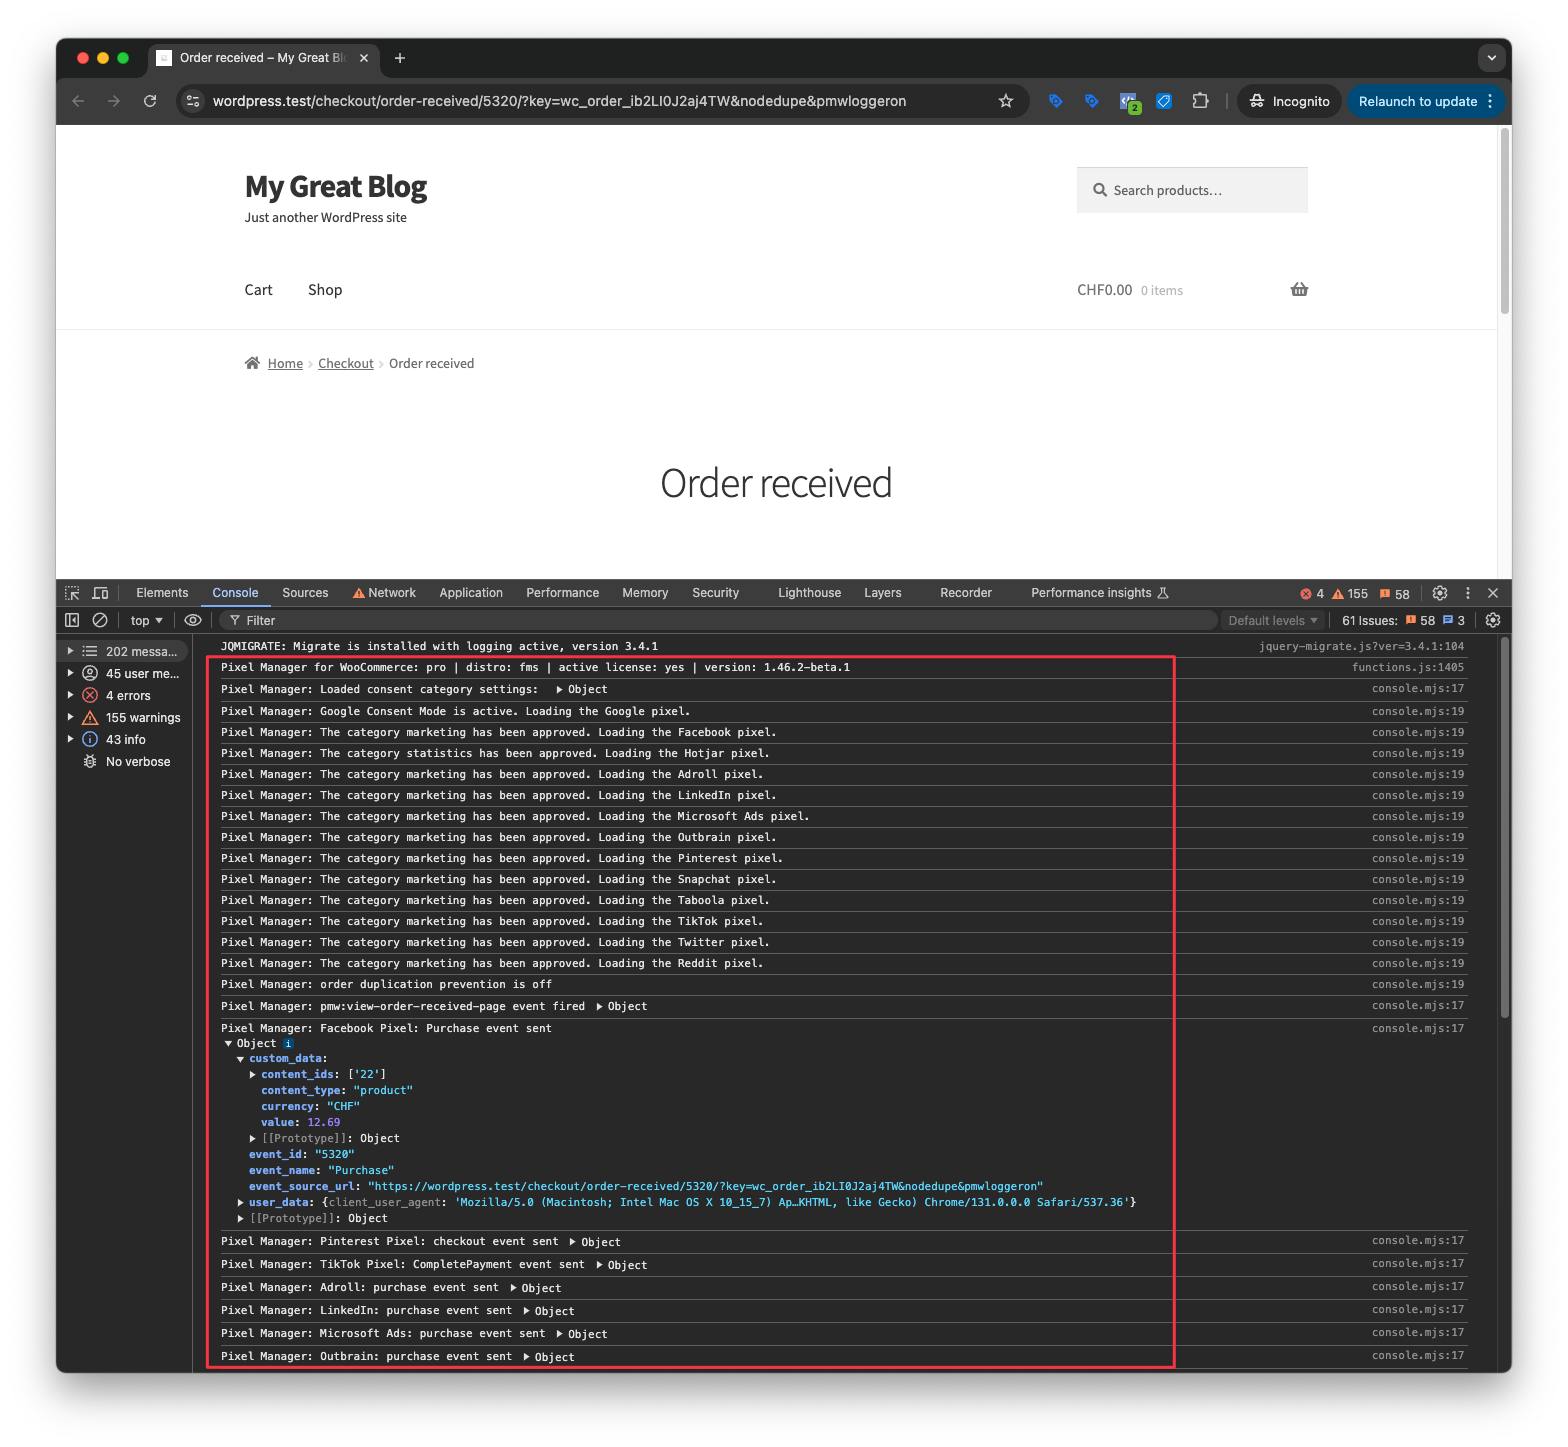
Order URL: When opening this special link the Pixel Manager will be instructed to output all the data that is sent to the marketing pixels in a human-readable format in the dev console.
The recommended way is to right-click on the order URL and open it in an incognito window. Then in that window open the dev console. You will see the data that is sent to the marketing pixels in a human-readable format.