Microsoft Advertising (Bing Ads)
The Microsoft Ads UET tag, including Microsoft Ads Consent Mode, is part of the free version. The Conversions API and Enhanced Conversions are pro features. Get the pro version here
Setting up the UET tag
Microsoft Ads requires setting up a UET tag and a purchase conversion separately. You can skip this step, if you already have an active UET tag set up. We only need one active UET tag.
-
Log into your Microsoft Advertising account.
-
In the menu click > Tools > Conversion tracking > UET tag.
-
Click > create UET tag.
-
Give it some meaningful name like
UET tag 1. -
Save it.
-
In the next window Microsoft asks how you want to set up tagging. Choose
Install the tag yourself. -
Then click
nextuntil the new tag shows up in the UET tag list. -
Copy that
UET tag ID. In the Pixel Manager, open Tracking Pixels → Microsoft, paste it into the UET Tag ID field, and save.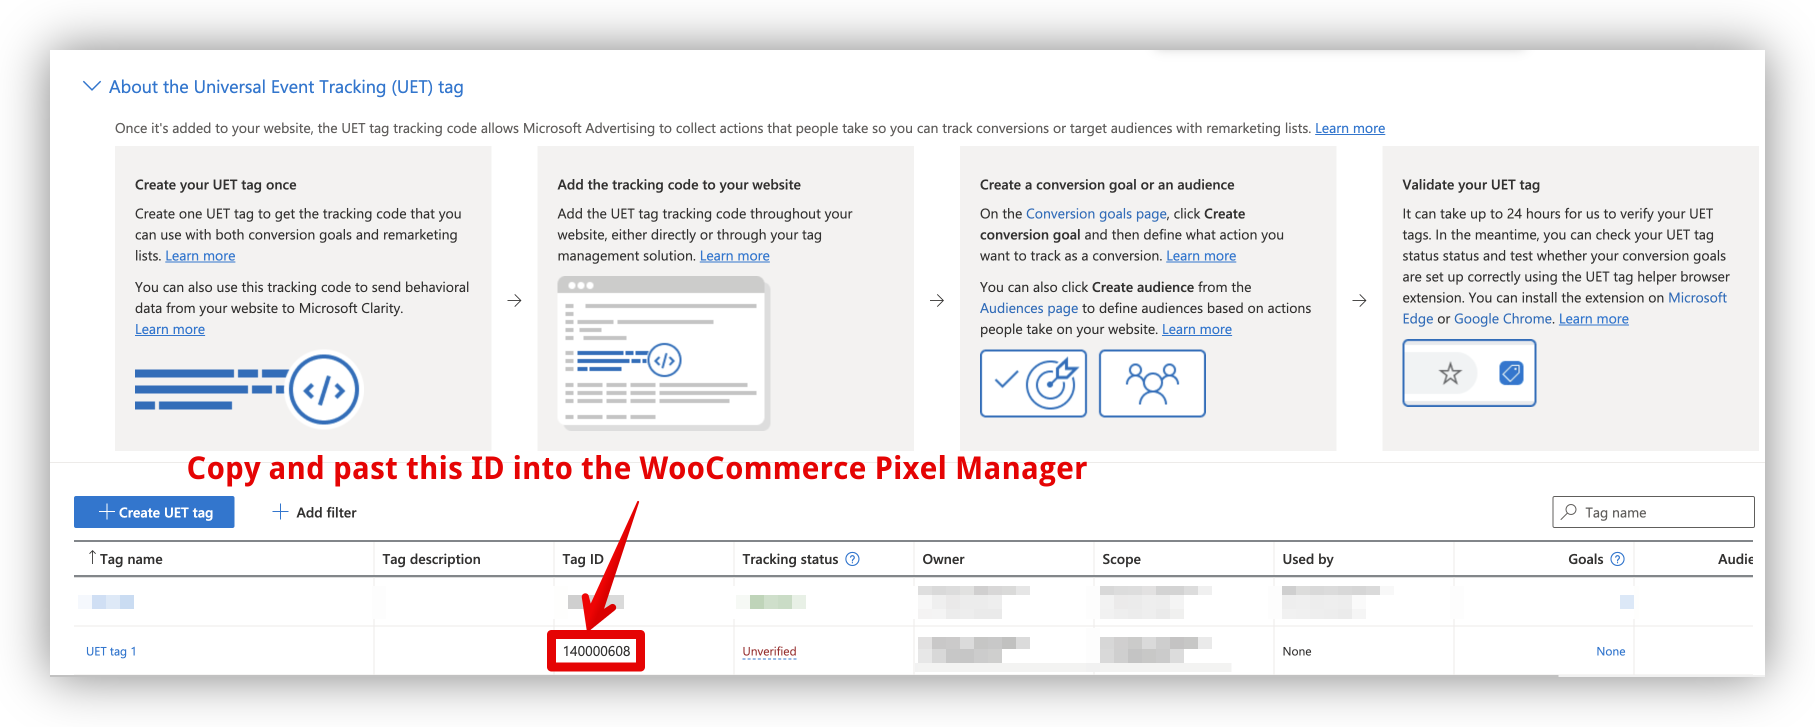
Setting up the purchase conversion
We will set up a new purchase conversion goal, using a purchase event. It is different in the way, that we don't use a destination URL (like in most setup guides), but by using a purchase event. It is much less error-prone and works equally well.
- In the menu click > Tools > Conversion tracking > Conversion goals.
- Click > Create conversion goal.
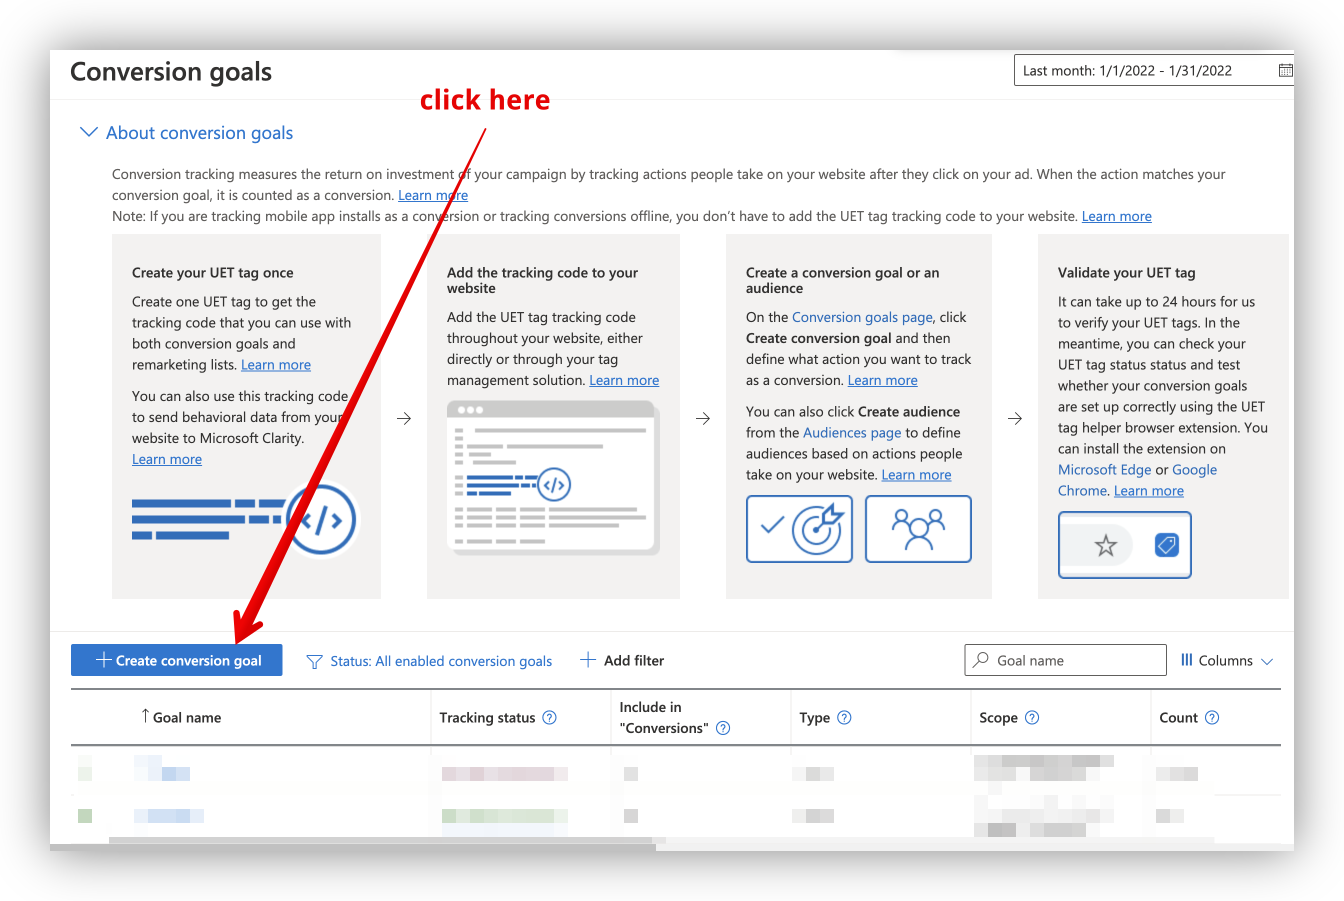
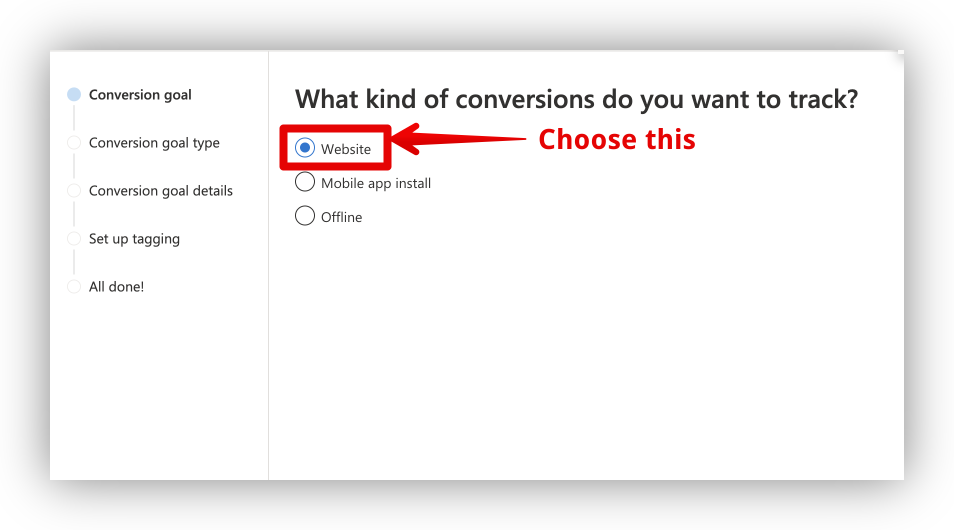
- What kind of conversions do you want to track? >
Website
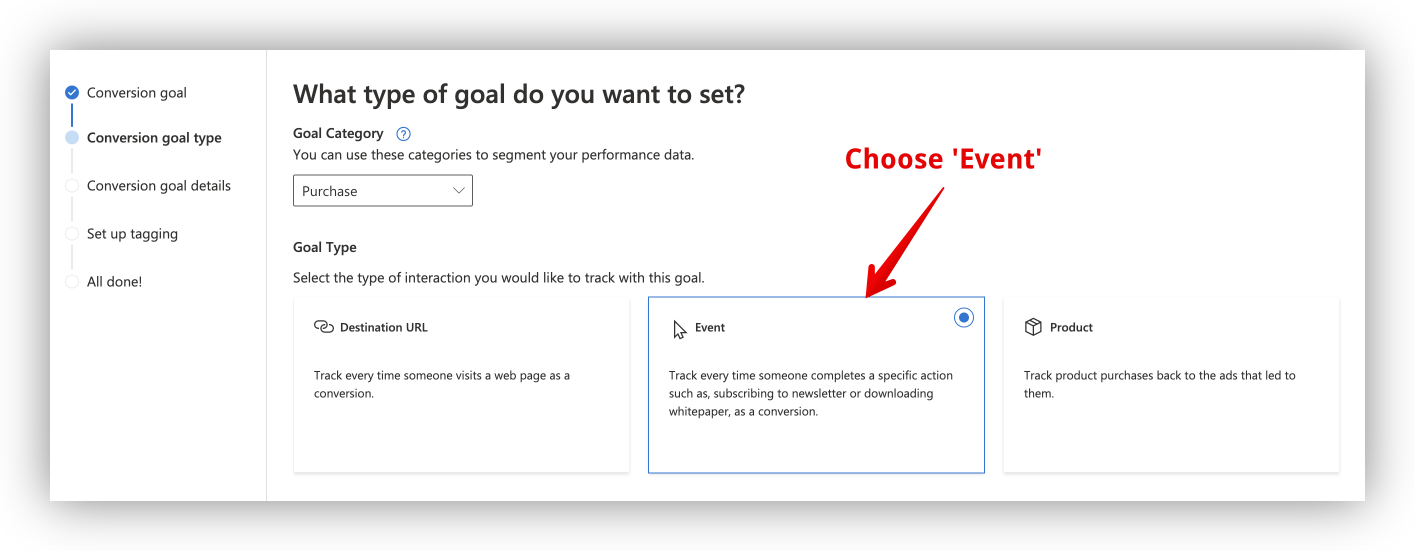
- What type of goal do you want to set? >
Purchase
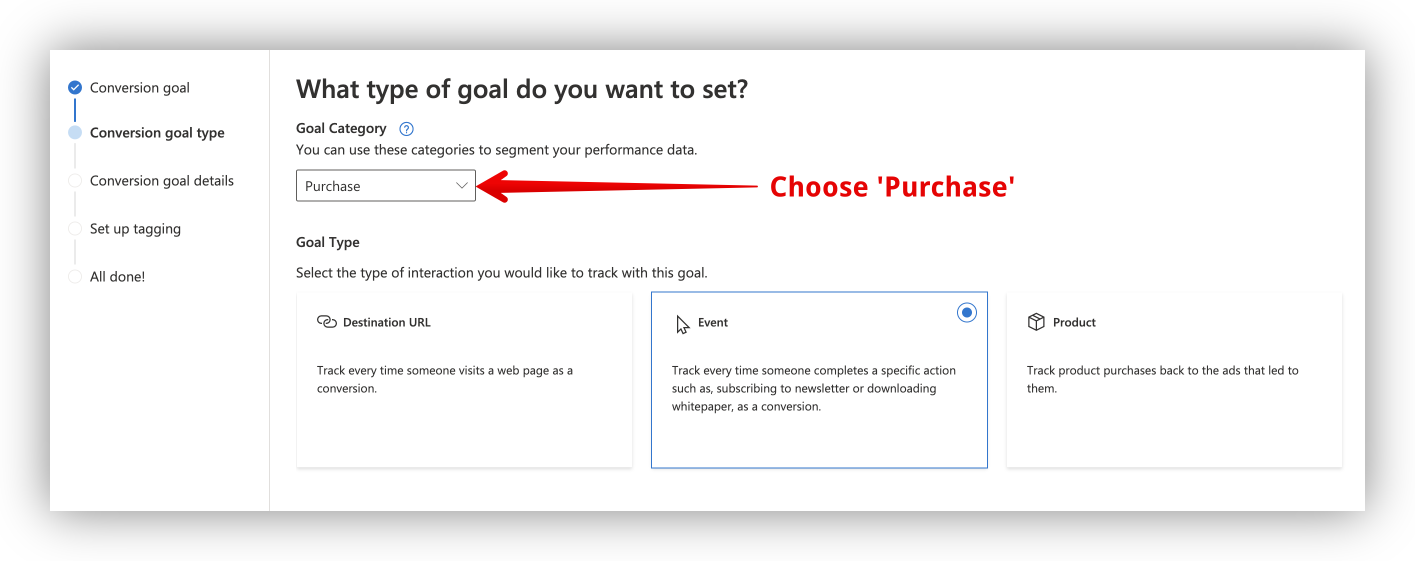
- Goal Type >
Event
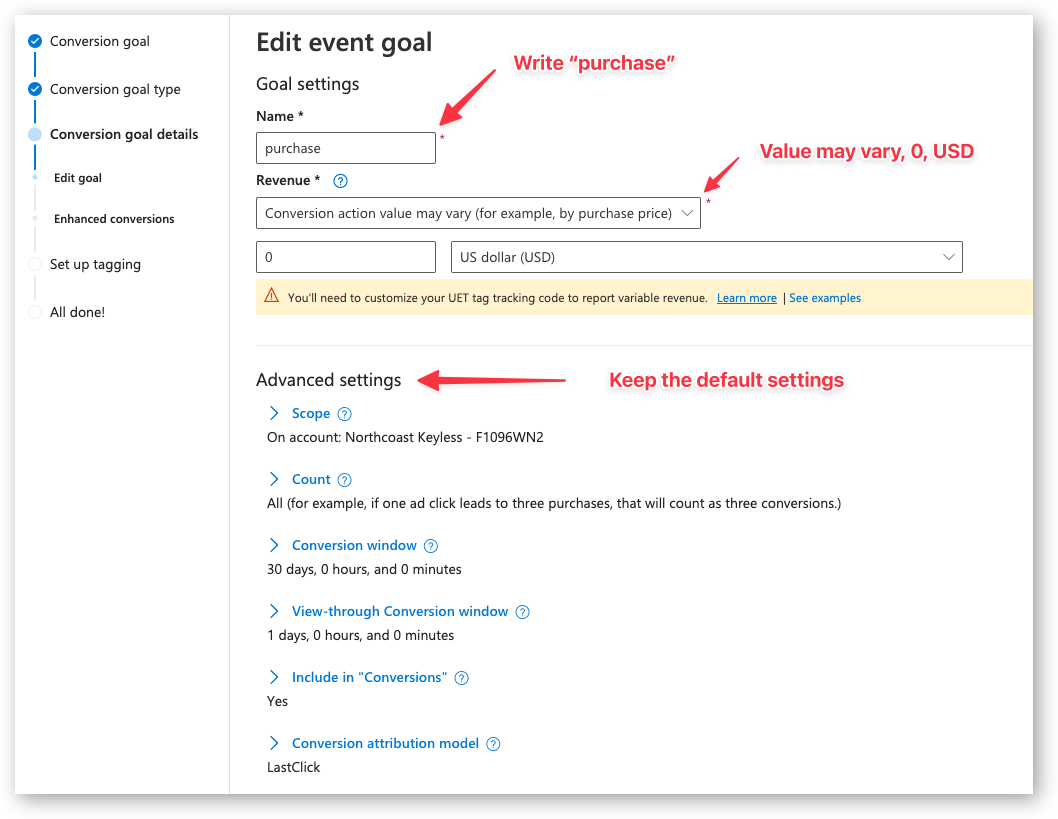
- Edit event goal
- Name:
purchase - Revenue:
Conversion action value may vary0USD(or the currency of your shop)
Keep the default settings for the advanced settings.
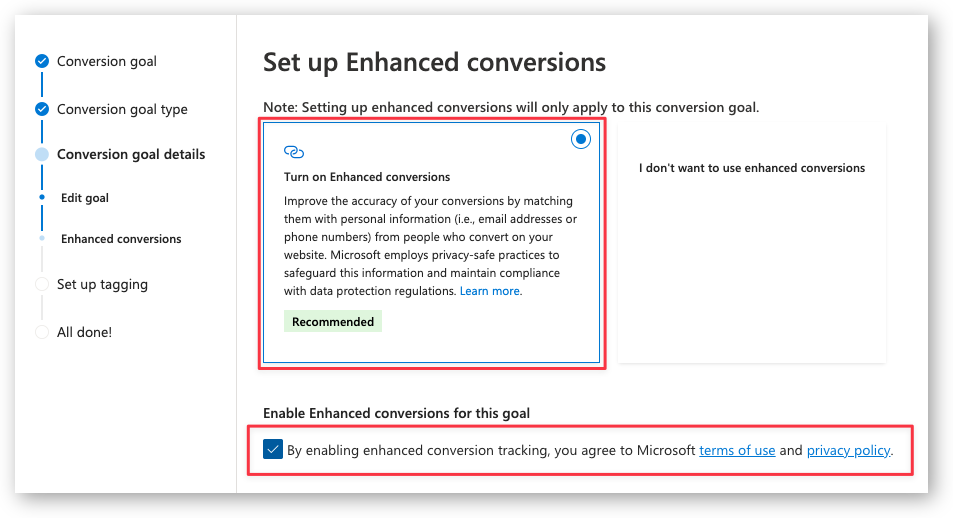
- Enhanced Conversions
-
Choose
Turn on Enhanced Conversionsand check the box if you want to pass the email and phone number to Microsoft Ads.In the Pixel Manager, open Tracking Pixels → Microsoft and turn on Enhanced Conversions, then save.
This is optional.
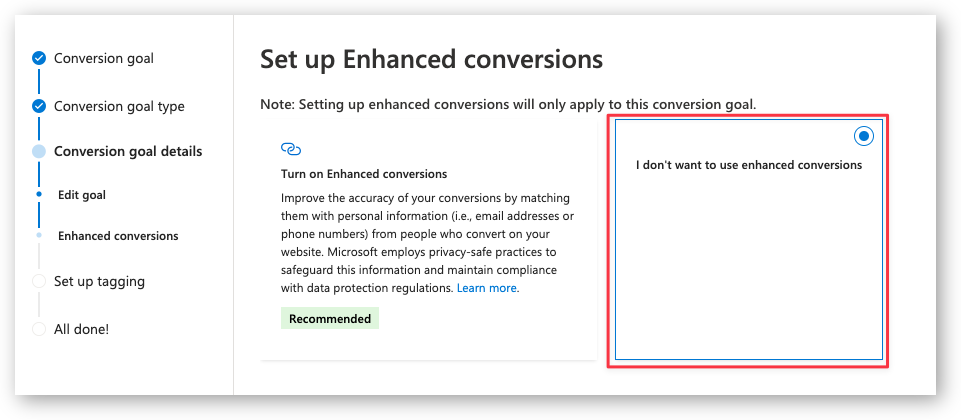
- Choose
I don't want to turn on Enhanced Conversionsif you don't want to pass the email and phone number to Microsoft Ads.
-
Set up tagging
- Choose the tag that you've set up earlier.
- Choose >
Yes, the UET tag was already installed on all website pages when you created another conversion goal or audience list. - Click Save and next
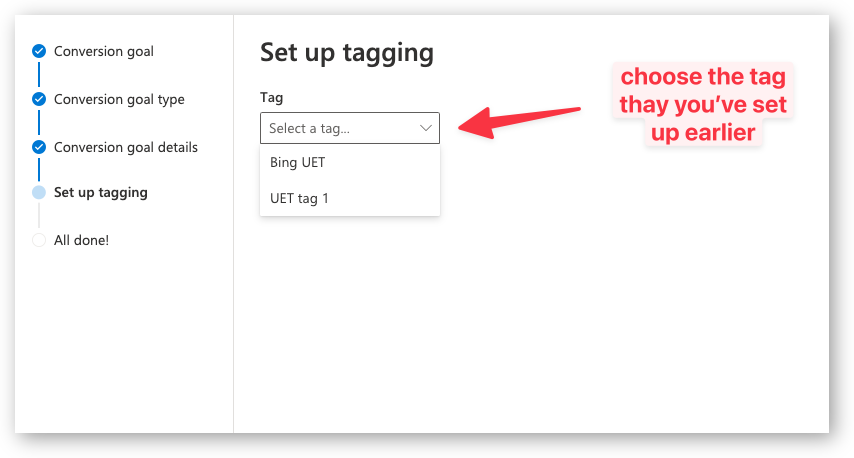
- Choose Manual installation
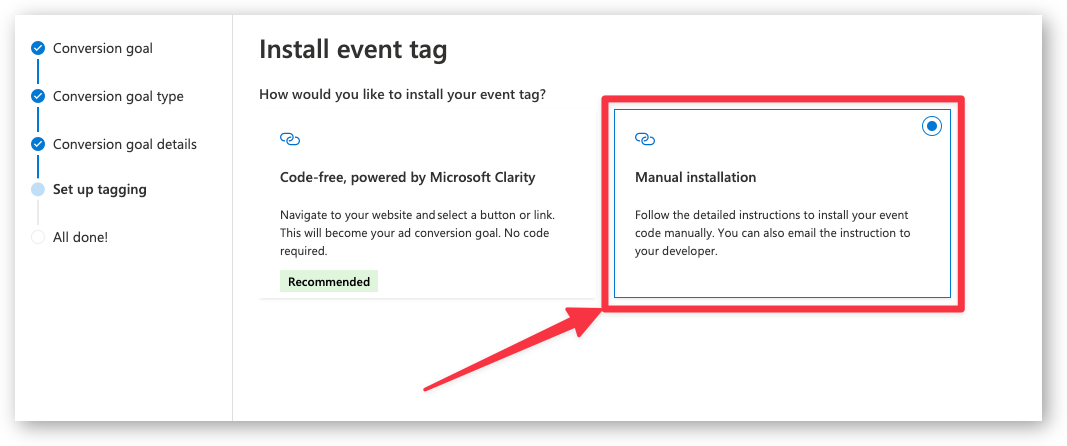
-
Custom event parameters
- Set equals to and purchase
- Set track event on inline action
- Click Save and next
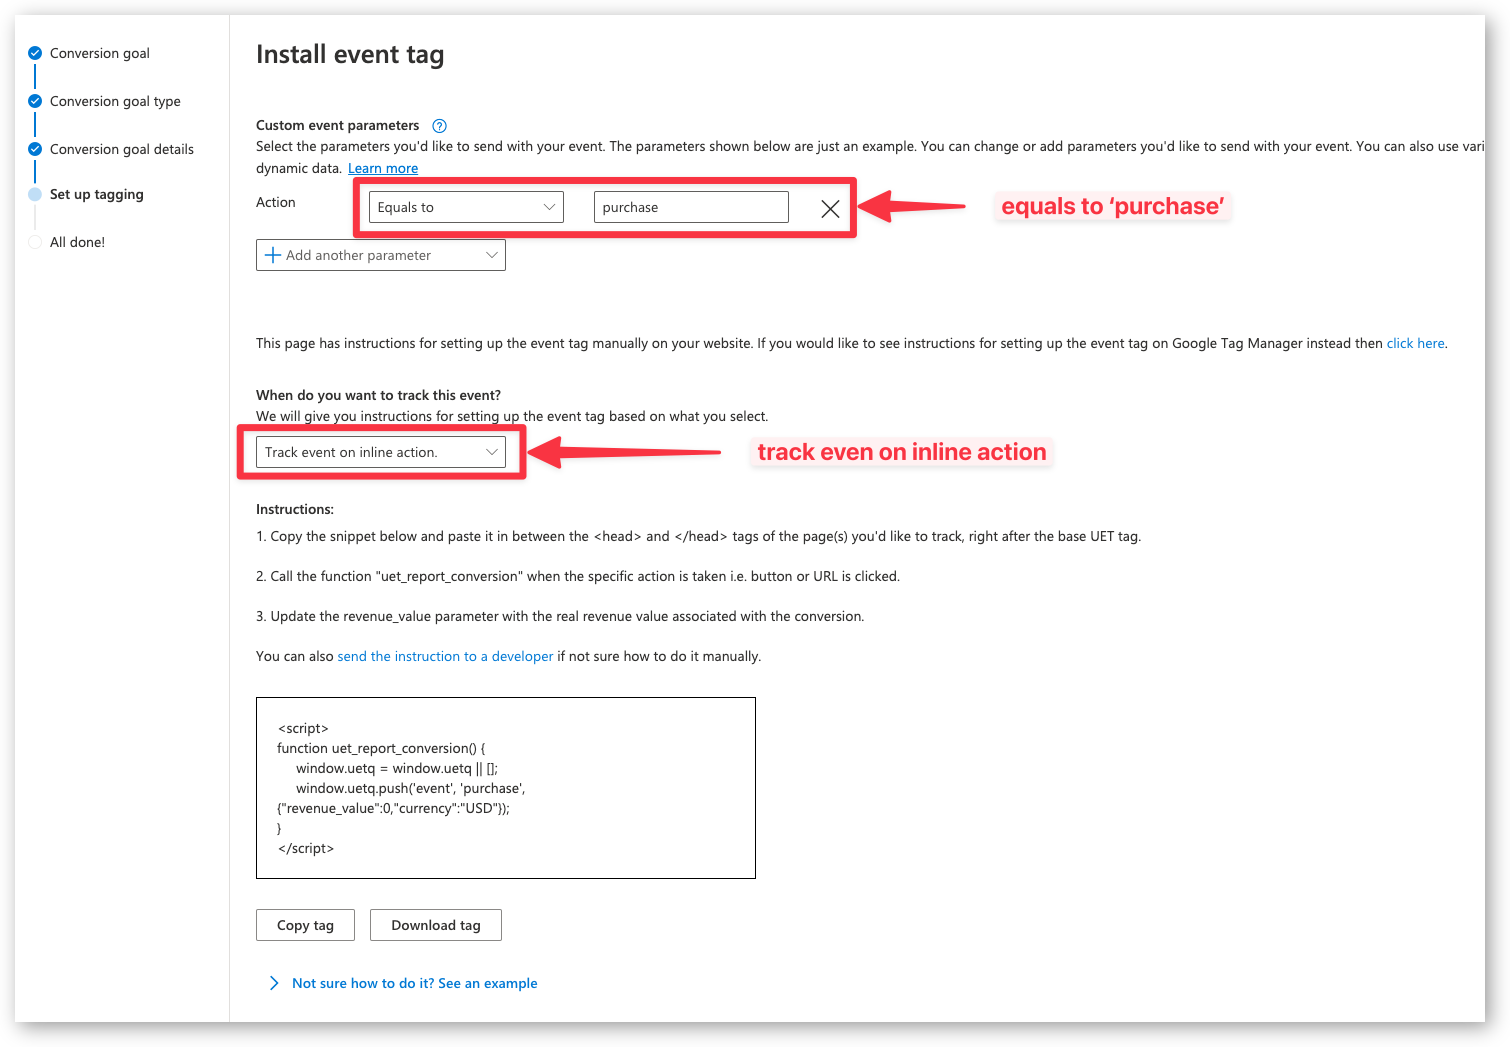
- Done
Conversions API (CAPI)
This is a pro feature. Get the pro version here
The Conversions API is an optional addition to your UET tag that sends conversion data to Microsoft Advertising in real time through Microsoft's server-to-server protocol. This provides more accurate conversion tracking, especially for events that might be missed by browser-based tracking due to ad blockers or privacy settings. Purchases are triggered directly by WooCommerce order events, so they are tracked even when the customer never returns to the order confirmation page.
The Pixel Manager sends every event with a shared event ID to both the UET tag and the Conversions API, so Microsoft automatically deduplicates the two channels. The Microsoft click ID (msclkid) is captured on the landing page and attached to the server-side events for attribution, together with the UET visitor ID, the customer's IP address and the user agent. The events also carry the page context Microsoft uses for referral remarketing lists and dynamic remarketing: the page URL, the referrer, the page title, and the category on category pages.
Find more information on the Conversions API in the Microsoft Advertising documentation.
The token is tied to one UET tag, so make sure the UET tag ID is configured before you add the token.
-
Open Microsoft Advertising: https://ads.microsoft.com/
-
Browse to Tools > UET tag
-
Select your existing UET tag using the pencil icon, then select Save and next
-
In the Set up tagging section, select Use Conversions API
-
In the Conversions API section, select Copy Token, then Next, then Done
-
In the Pixel Manager, open Tracking Pixels → Microsoft, paste the token into the Conversions API Token field, and save.
You can offload Microsoft Advertising Conversions API calls from your WooCommerce server to the edge using the Server-Side Proxy. This reduces server load and improves tracking accuracy by routing events through a first-party subdomain.
Testing
Microsoft Advertising has no test event code for the Conversions API. Verify the events on the live tag instead:
- Open Tools > UET tag in Microsoft Advertising and check that the tag status shows recent activity
- Place a test order in your shop and confirm the conversion appears under Conversions
- Enable the Pixel Manager's debug mode to see the outgoing Conversions API requests in the WooCommerce logs
Enhanced Conversions
This is a pro feature. Get the pro version here
Enhanced Conversions for Microsoft Ads improves conversion attribution accuracy by sending hashed first-party customer data (such as email addresses) to Microsoft. This helps Microsoft match conversions more reliably, especially in cross-device and cookieless scenarios.
Benefits
- Better attribution: Match conversions that would otherwise be lost due to cookie restrictions or cross-device journeys.
- Privacy-safe: Customer data is hashed using SHA-256 before being sent to Microsoft.
- Improved bidding: More accurate conversion data leads to better automated bidding performance.
How to Enable
- In Microsoft Ads, when creating or editing a conversion goal, select Turn on Enhanced Conversions (see step 7 in the setup guide above).
- In the Pixel Manager, open Tracking Pixels → Microsoft.
- Turn on Enhanced Conversions.
- Save the settings.
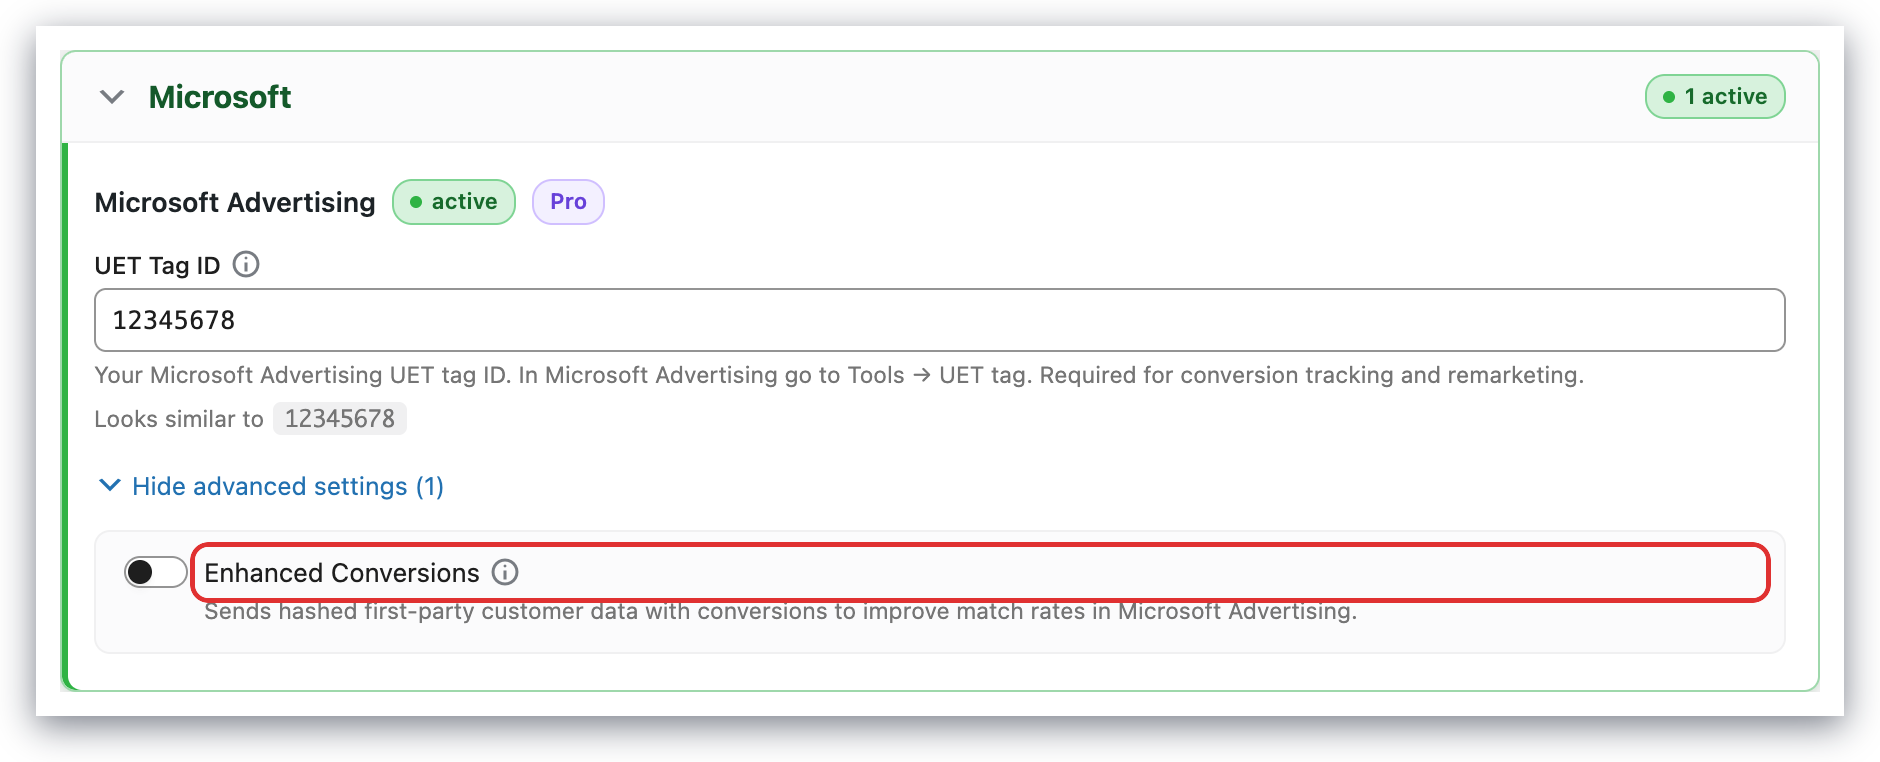
Once enabled, the Pixel Manager will automatically send hashed customer data (email, phone number if available) with conversion events to improve attribution accuracy. The same hashed values are attached to the Conversions API events as em and ph.
Troubleshooting
The conversion goal records nothing, although UET events arrive
Symptom: The UET tag shows recent activity and purchase events reach Microsoft, but the purchase conversion goal stays at zero.
Cause: Usually one of two things:
- The goal conditions cannot match. The Pixel Manager sends the purchase as an event with the action
purchase, plus the revenue, currency and product IDs. It sends no event category and no event label. A goal that has a condition on Category or Label therefore never matches, whatever value you enter there. - Microsoft only counts conversions it can attribute to an ad. A purchase from a visitor who did not click one of your Microsoft ads (or, for view-through goals, see one within the view-through window) is received but never reported as a conversion. Click attribution relies on the
msclkidclick ID, so auto-tagging must be on in your Microsoft Advertising account. - The visitor denied consent under Microsoft Consent Mode. With Consent → Microsoft Ads Consent Mode → Enable Microsoft Ads Consent Mode with standard settings active, a visitor who denies consent gets no click ID cookie, so Microsoft cannot attribute their purchase. This is expected.
Microsoft also reports conversions with a delay. They appear in the goal after a few hours, so an order placed a moment ago does not show yet.
How to confirm: Open the goal under Tools → Conversion tracking → Conversion goals and check its event conditions. Place a test order and, in the browser's DevTools Network tab, filter for bat.bing.com. The purchase request carries ea=purchase and no category or label parameter.
Fix: Edit the goal so that only Action has a condition, equals to purchase, as in the setup guide above, and leave Category, Label and Value without conditions. To check that the purchase event itself arrives, place a test order with Microsoft's UET Tag Helper browser extension active and confirm that it shows the purchase event. Attribution can only be confirmed with a real order that came from a Microsoft ad.
Supported Events
Here's a list of supported events.

