What is Facebook's Conversion API (CAPI), and how do I use it on my site?
TLDR
- If you run Facebook Ads, then you'll want to track conversions when customers land on your WooCommerce store from an ad.
- Many WooCommerce stores use the Meta pixel in their browser, but it's recommended that you also use Facebook's Conversion API (CAPI), which enables server-to-server tracking on your site. This gives you more accurate data to work with and lets you track offline events too.
- In this article, you'll find out how to integrate Facebook CAPI using Pixel Manager for WooCommerce.
 Alt= Facebook displayed on a cellphone
Facebook is one of the most popular social media platforms in the world. It's used by more than 2.32 billion people every single month. This makes a great place to reach new customers for your eCommerce store, which is why so many businesses, including WooCommerce stores, use Facebook Ads to direct potential customers to their websites.
Most companies do this by using browser pixels that track conversions that come from Facebook Ads. By using browser pixels, you can collect important data about your site visitors and the way they behave. While this is a great way of collecting data about site visitor behavior, businesses also need to account for data gaps. For example, if a redirect goes wrong and a customer doesn't reach the purchase confirmation page, the browser pixel won't send any data.
Meta has come up with a solution to this issue by developing the Facebook Conversion API. Facebook's conversion API or CAPI allows for robust data attribution and conversion reporting and can usually track events even in instances when the browser pixel isn't able to.
In this article, we explain exactly what Facebook's CAPI is, why it's important, and how you can use it on your WooCommerce site.
What is Facebook's Conversion API?
Facebook's Conversion API, previously known as the Facebook Server-Side API, is used for server-to-server tracking. It connects your website data (which is housed on your server) to Facebook Ads Manager (which is housed on Facebook's server).
Server events are linked to a Meta Pixel ID and processed like browser pixel events. This means you can see the performance of your Facebook Ad campaigns and how users behave on your website once they land there through your ads. Conversion API gives businesses a full picture of the customer journey, including off-site purchase events, whether they continued their free trial and then converted, etc.
Because CAPI isn't affected by factors that can cause data gaps, like browser crashes, you don't need to worry about important data getting lost, which makes CAPI an extremely efficient and accurate tracking tool.
This is how the tracking process works in essence:
- The customer enters your website from a Facebook Ad. Your website will be equipped with Facebook Pixel to document user data.
- The server will save user data in the same way it will save Google Analytics Client ID and other parameters.
- When the user triggers one of the conversion events, the server will make a request that contains information about the event and the relevant user data to the Facebook server.
Why you should use Facebook CAPI on your WooCommerce store
So, why do you need to implement the Facebook Conversion API on your Meta Ad campaigns, especially if you already use the browser pixel? Let's look at the main benefits:
Events are far less likely to get lost using Facebook CAPI
If you use Facebook CAPI alongside the Facebook browser pixel, your data will be more reliable because you are collecting data through both methods. CAPI tracks many of the same events as the browser pixel, but these events are recorded server-to-server. This is very handy if there are issues that prevent the Facebook browser pixel from working reliably, e.g. if the browser crashes. Facebook CAPI will close the gap and ensure that your data is accurately and consistently recorded.
Have a plan in place for future cookie restrictions
While third-party cookies are not going to be phased out overnight, it's important to prepare for any restrictions that may happen in the future. By setting up Facebook CAPI now, you can reap the benefits now, and have a backup plan in place.
Facebook CAPI will capture events that aren't recorded on your site
Not all server-side events happen on your website. Depending on the method you use to integrate CAPI into your WooCommerce store, the conversions API allows you to track events that the Facebook Pixel simply can't, including offline events like subscription renewals.
We should add that none of this means that browser-based pixel tracking is outdated. In fact, it's actually recommended that you use Facebook CAPI alongside pixel tracking. The Facebook Pixel tracks information that the CAPI can't, including demographic data.
When you combine both tracking methods, you get the full picture of the complete customer journey. Tracking will become more reliable because the CAPI and the Facebook Pixel will track several of the same events (such as Add Payment Info, Add to Cart, Page View, and Purchase). By having mirrored tracking of these events, you'll have more accurate data to work with.
How do I set up Facebook CAPI on WooCommerce?
The best way to integrate Facebook CAPI with your WooCommerce store is to use a plugin, which will seamlessly connect your WooCommerce store with Facebook Ads Manager and which will be pre-configured to track important conversion events in your store. The best plugin for the job is Pixel Manager for WooCommerce.
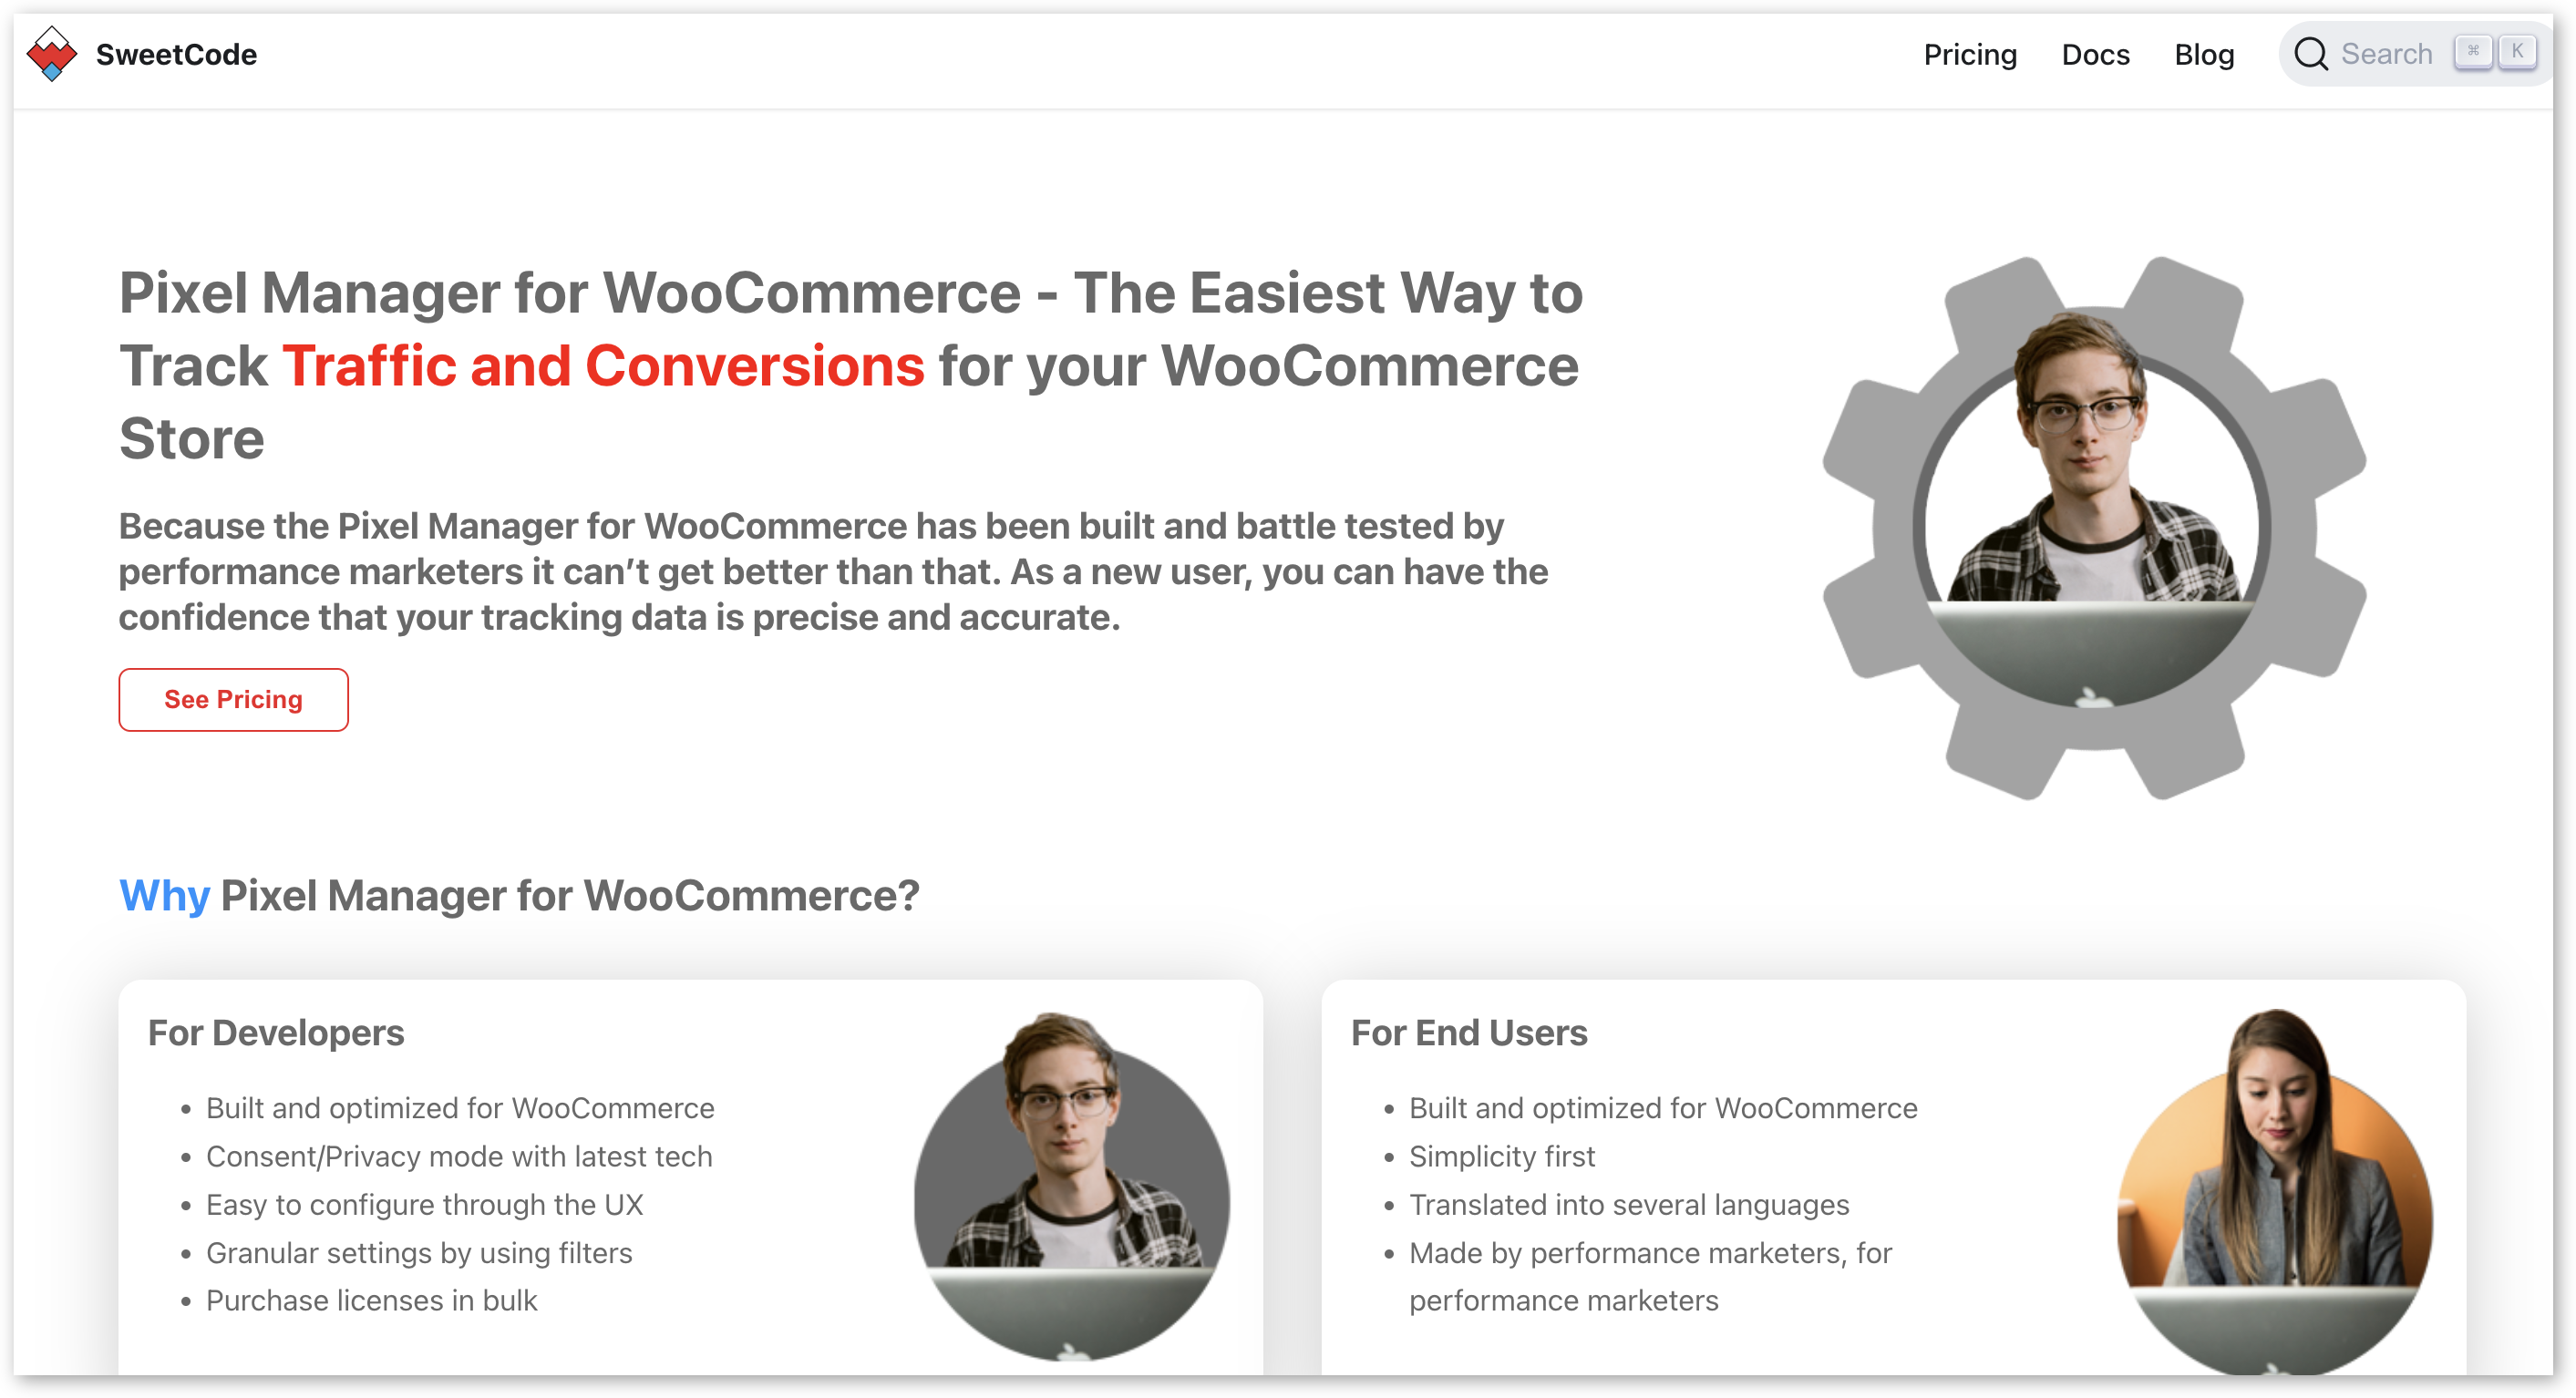
Pixel Manager for WooCommerce is not only the most accurate pixel tracking plugin available but one of the easiest to set up and use. You can connect your WooCommerce data to your Conversion Reports on various supported platforms, in addition to Meta Ads.
The pro version of the plugin lets you set up tracking for the Facebook CAPI, with a quick and easy process. Using CAPI, the plugin will track all of the same events as the Facebook browser pixel. It will also track subscription renewals as offline events.
If data privacy is of concern to you, you will be reassured knowing that Pixel Manager for WooCommerce makes it possible for you to get the most out of your data through CAPI while staying compliant with privacy laws. The plugin won't send a CAPI hit if a visitor is blocking the Meta pixel, but you can choose to Process Anonymous hits as an alternative. That way, you can still gain valuable insights through anonymized data.
How to integrate Facebook CAPI with Pixel Manager for WooCommerce
Integrating with Facebook CAPI is very simple with Pixel Manager for WooCommerce. However, in order to use it, you will need the following:
- Meta Business Manager
- A Facebook Pixel with your website, correlated with the Business Manager
- An access token
We'll show you how to create your pixel in the guide below.
- You will need the Pixel Manager for WooCommerce plugin, so choose the plan that works best for your needs. All pro plans will let you set up CAPI - it's just a matter of how many sites you need the plugin for.
Once you've downloaded the plugin, install it by uploading it to the WP plugins directory and activating it in the Plugins menu in the WordPress backend.

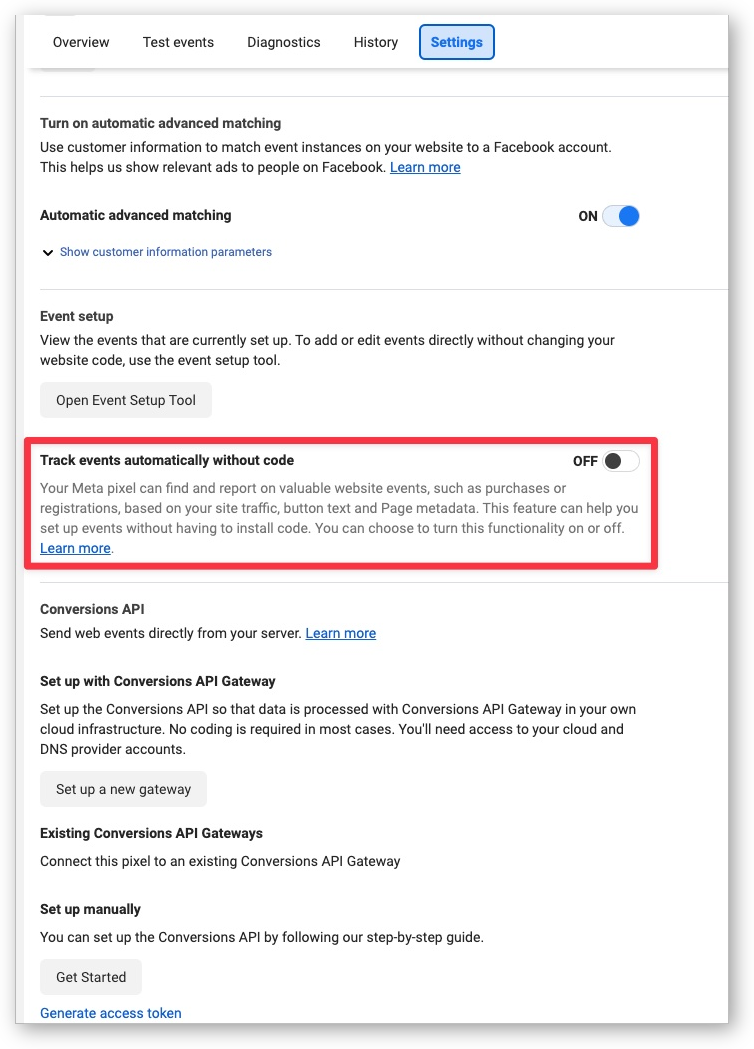
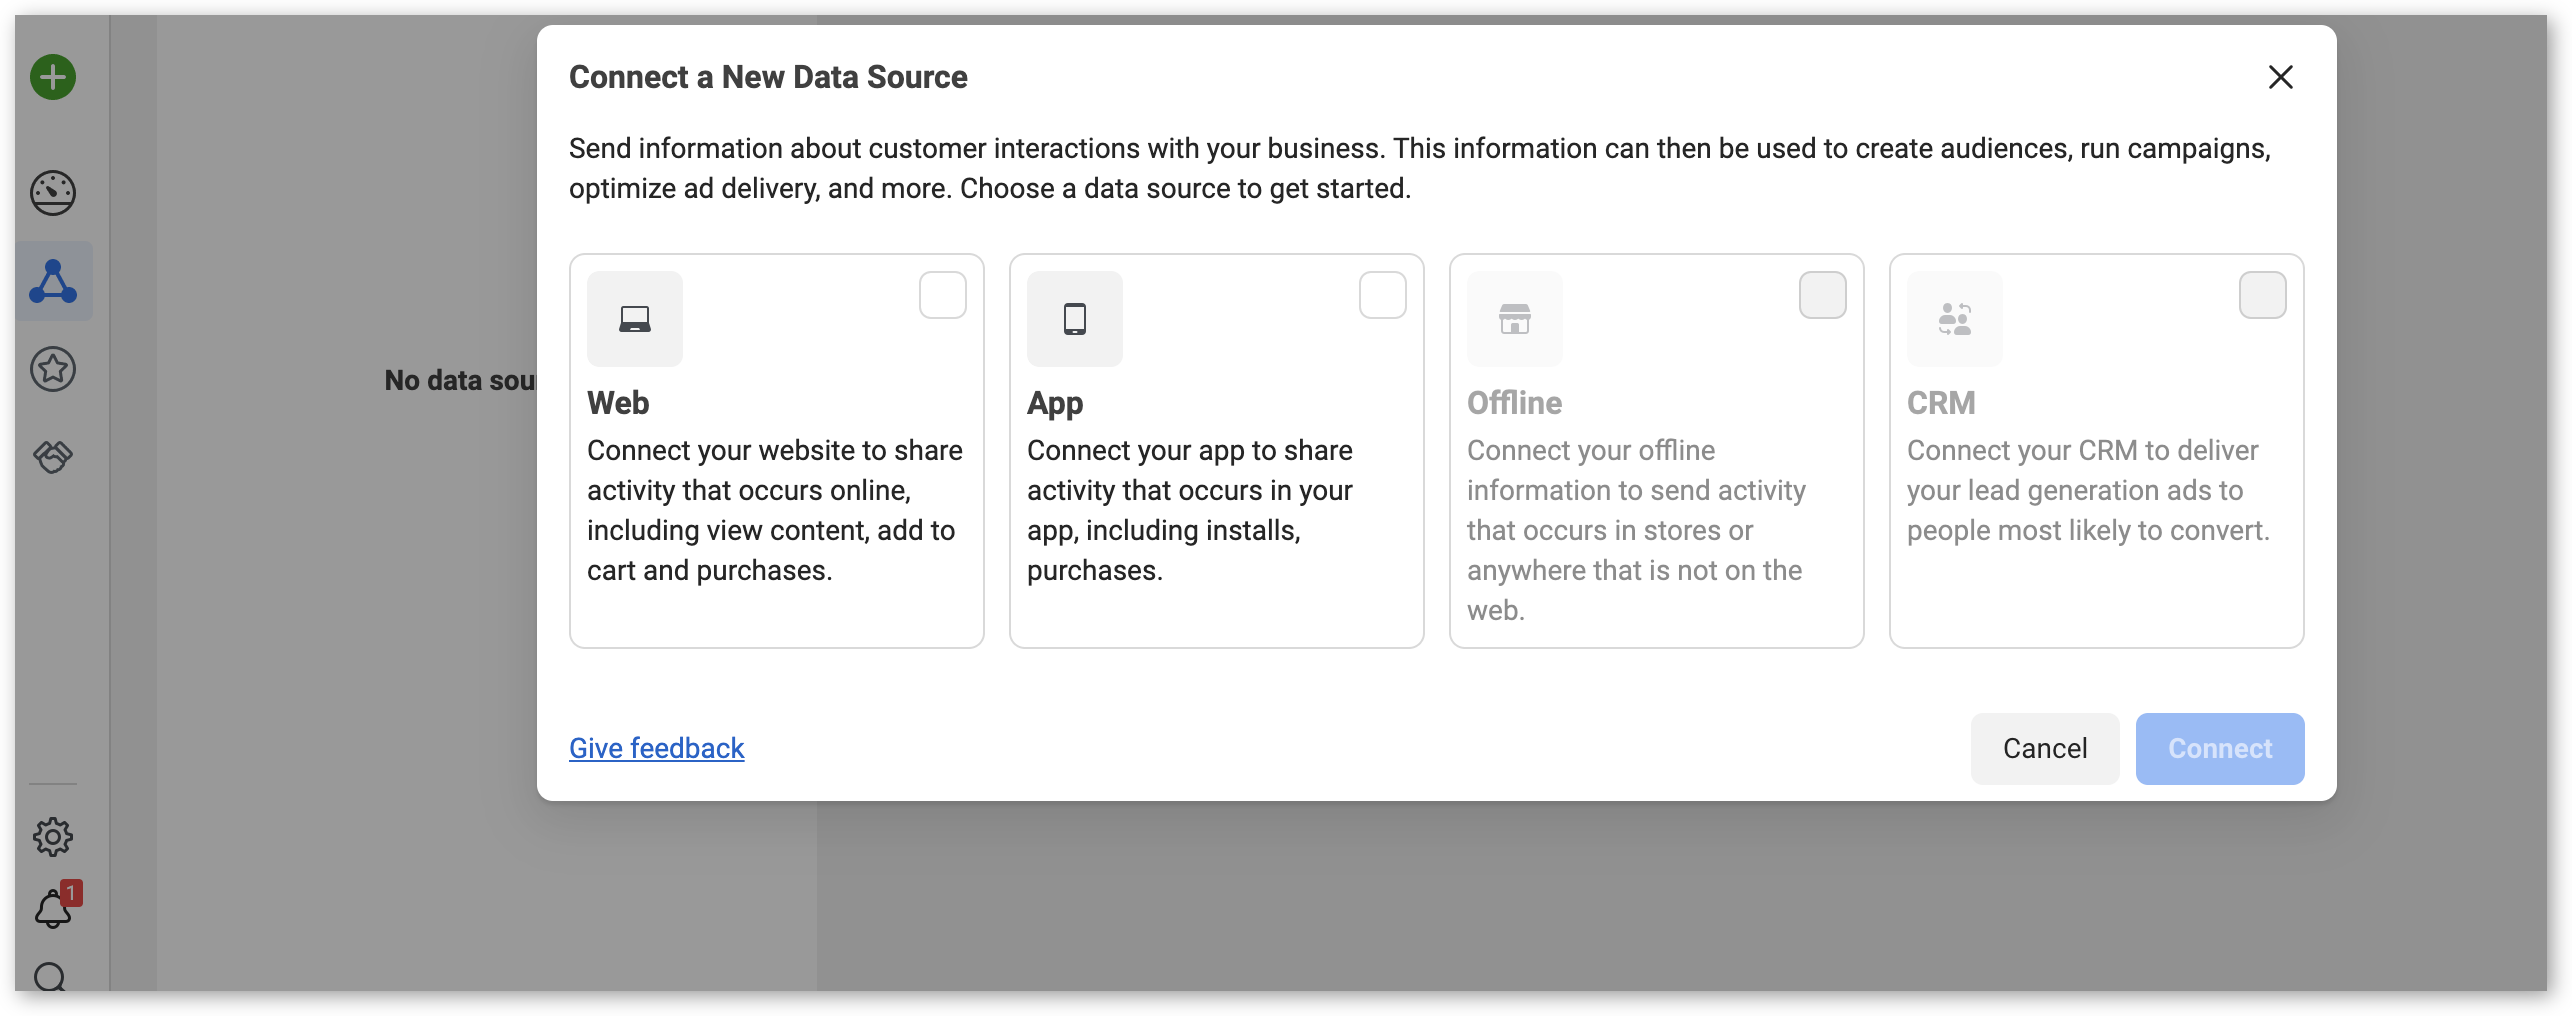
- Create your Meta pixel by going to Facebook Events Manager. Click the green + sign to connect data sources. Select Web > Meta Pixel > Connect. Add your pixel name and your website URL. Click Continue.
Before exiting, click on Settings and make sure that automatic event tracking is disabled. Having this enabled may mean that some events will get duplicated, which impacts data accuracy.
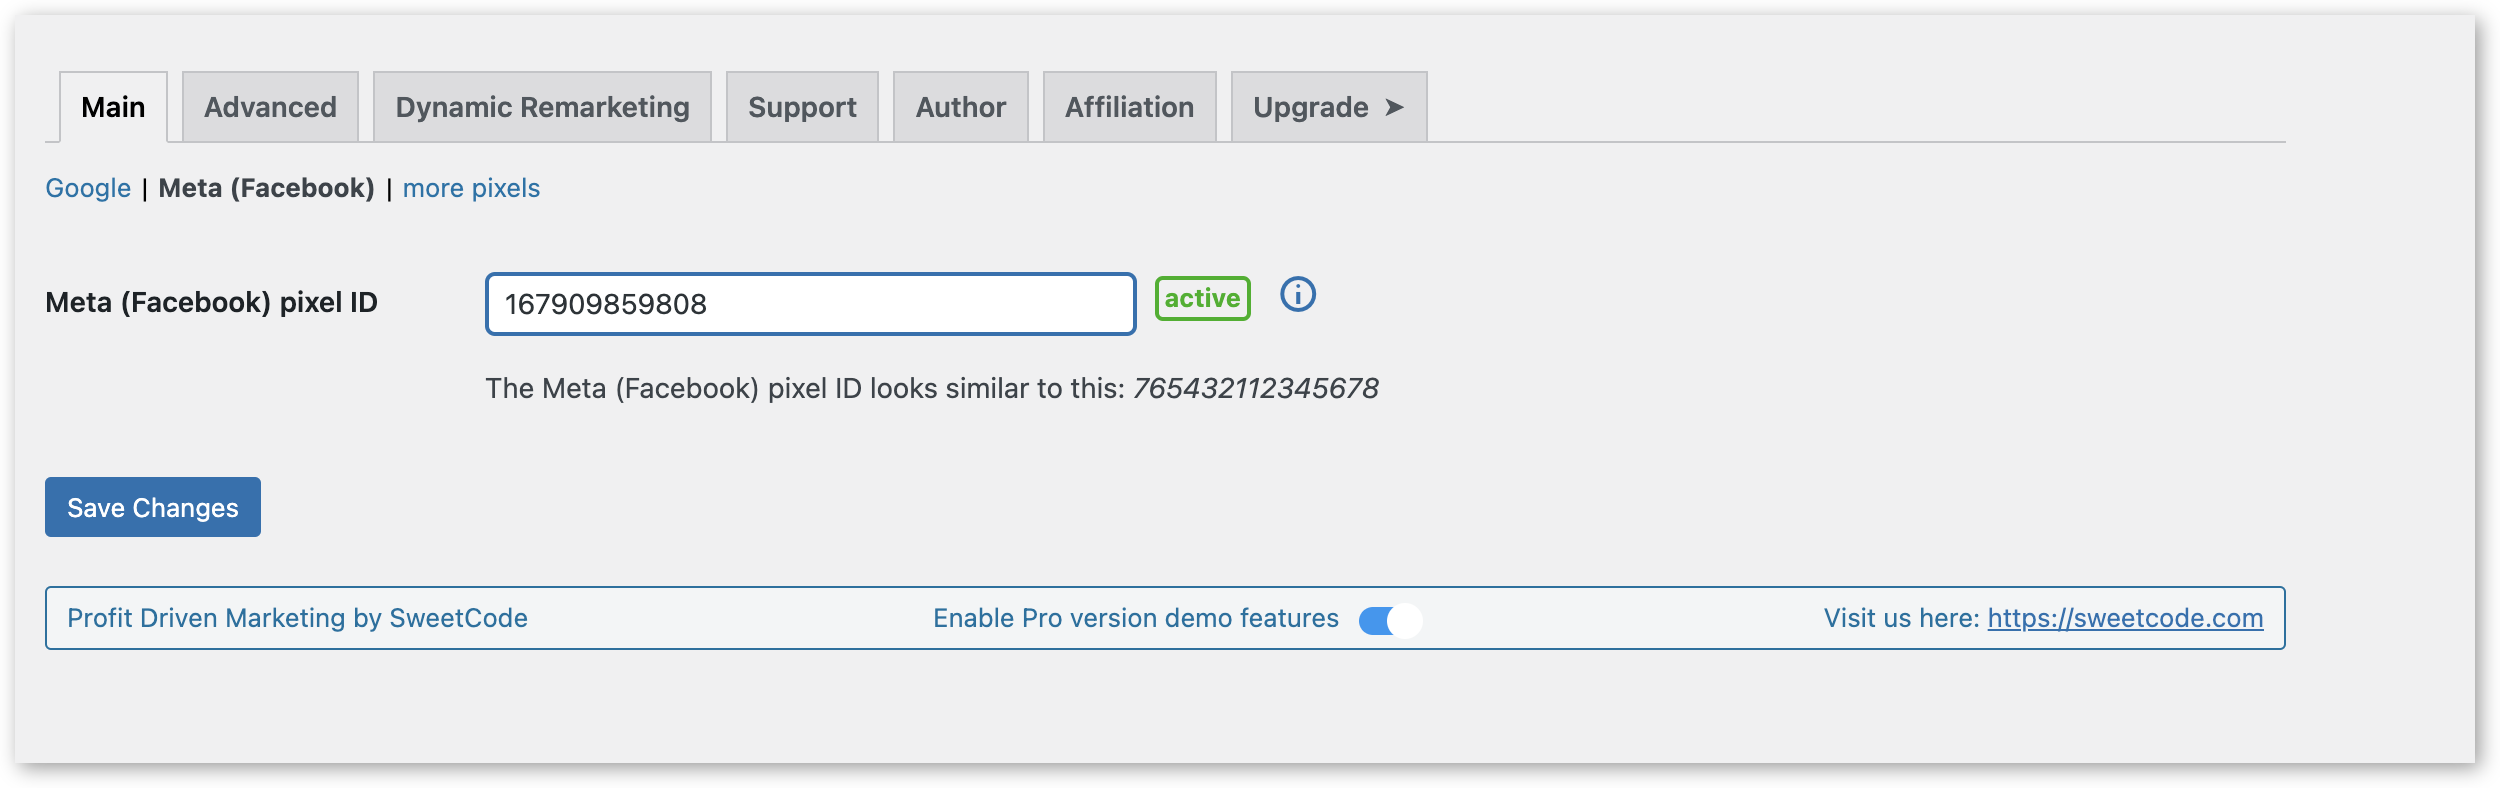
- Go to your website's admin panel. Select WooCommerce > Pixel Manager and choose Facebook (Meta). Enter the pixel ID you generated in the previous step. Save your changes.
- Now, we can enable CAPI. You've already received your pixel ID and have a Business Manager account. All you still need to get started is your access token. There are a few ways of generating this token, but Facebook recommends using Events Manager.
Choose the Meta Pixel you'd like to implement, click on Settings > Conversions API > Set Up and then Generate Access Token. Then, simply follow the steps in the pop-up to complete the setup process.
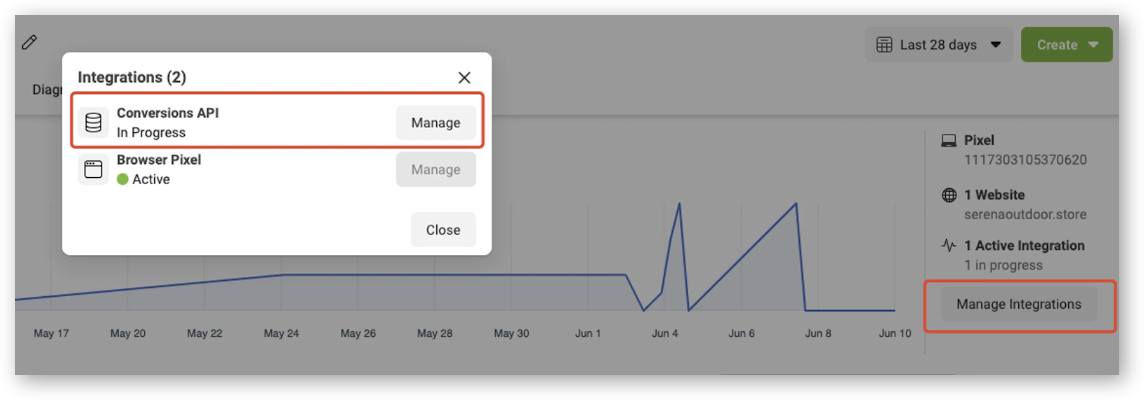
- Next, go to Overview > Manage Integrations > Manage. Click the Manage button to create a Conversions API system user.
- Head back to WordPress and paste the access token into the advanced section for Meta (Facebook). Hit Save, and your CAPI will become active immediately, using both the pixel and the CAPI.
Pro Tip: Using the Meta (Facebook) Conversion API (CAPI) will increase the load on your server. You may need to upgrade your server capacity if it reaches its limits.
Set up Facebook CAPI in your WooCommerce store today
If you run Facebook Ads to generate leads to your WooCommerce store, then you will need to track how customers behave on your website once they land there. Many WooCommerce store owners get by with the Meta browser pixel, but for even more accurate and reliable data, you should use both the conversations API and browser pixel tracking.
This way, you'll be recording events twice - through the browser and through the server - which makes it much harder for events to get lost, so you'll have much more reliable conversion data to work with. You can also use CAPI to record offline events, like subscription renewals, which won't be recorded in the browser.
Pixel Manager for WooCommerce is the best tracking plugin for WooCommerce, as it offers an easy and accurate solution for Facebook CAPI tracking. All plans come with a 14-day money-back guarantee. Pick your plan and get started today!